Skip to content

Stefcho's Tech Blog

Software Development, Cloud, DevOps and PfSense

Tag: Windows Server 2008 R2

OpenVPN with RADIUS authentication on pfSense 2.0 RC1

Posted on 26/04/2011 - 18/02/2019 by Stefan

This is the last post in the series of authentication alternatives for OpenVPN in pfSense 2.0 RC1.

In the previous posts we looked at the local database of pfSense and Active Directory. Now we will use Remote Authentication Dial In User Service (RADIUS) instead. Again we will authenticate our users against Active Directory, as domain user accounts.

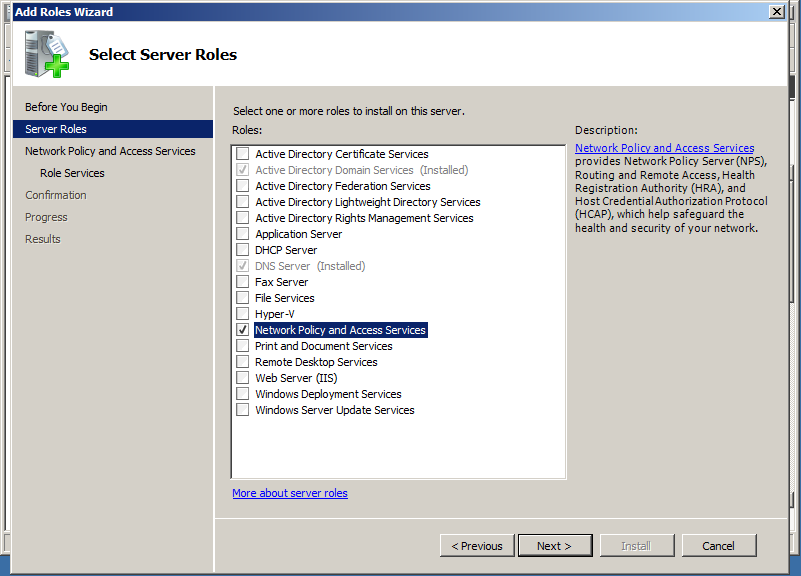
For that purpose we need to add Network Policy and Access Services server role to our Windows Server 2008 R2.

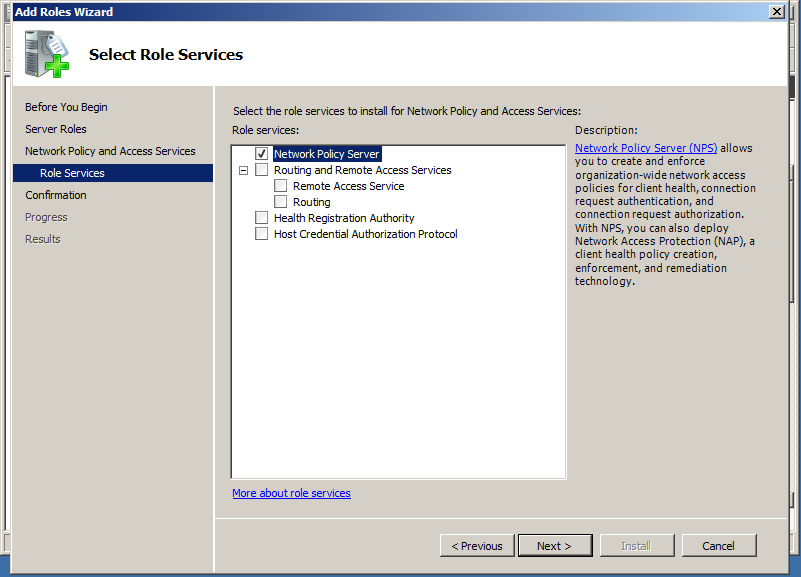
From the Role services select only the Network Policy Server. We don’t need any of the other services.

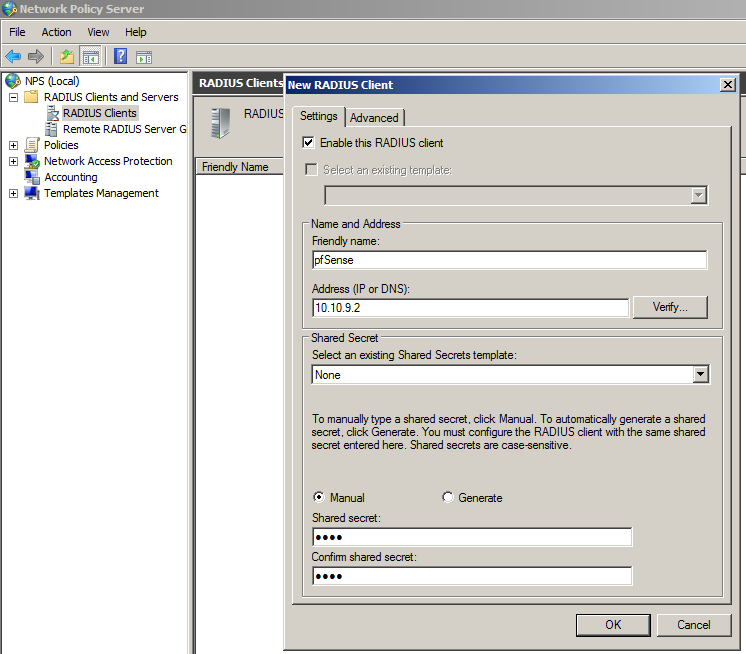
After the successful installation, open the Network Policy Server console. Under RADIUS Clients and Servers, create new RADIUS Client.

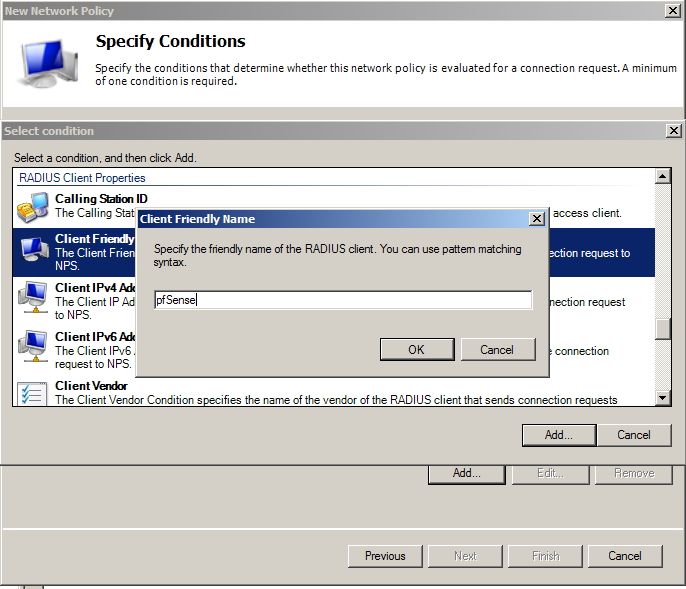
Take note of the Friendly name of the client, we will use is later in the Network Policy. In our case pfSense.

Enter the LAN address of pfSense, and Shared secret.

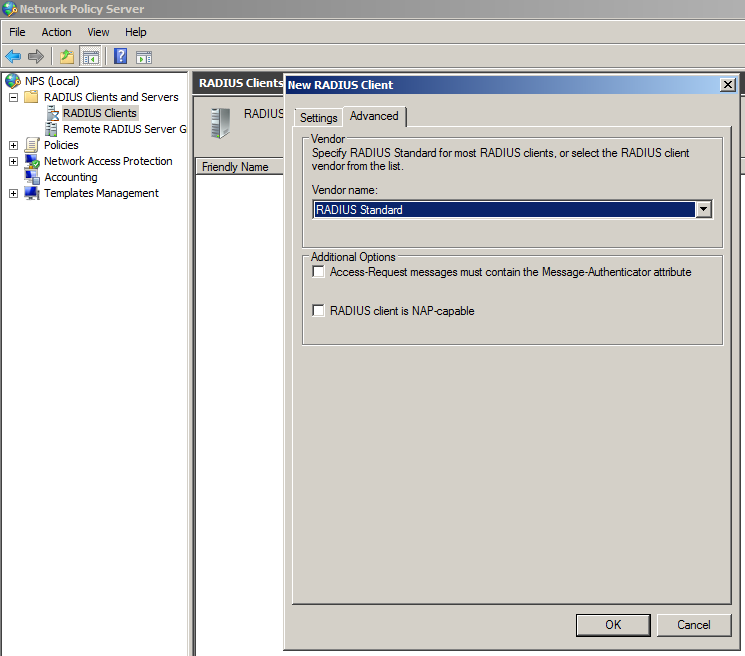
Leave the default configuration on the Advanced leaf.

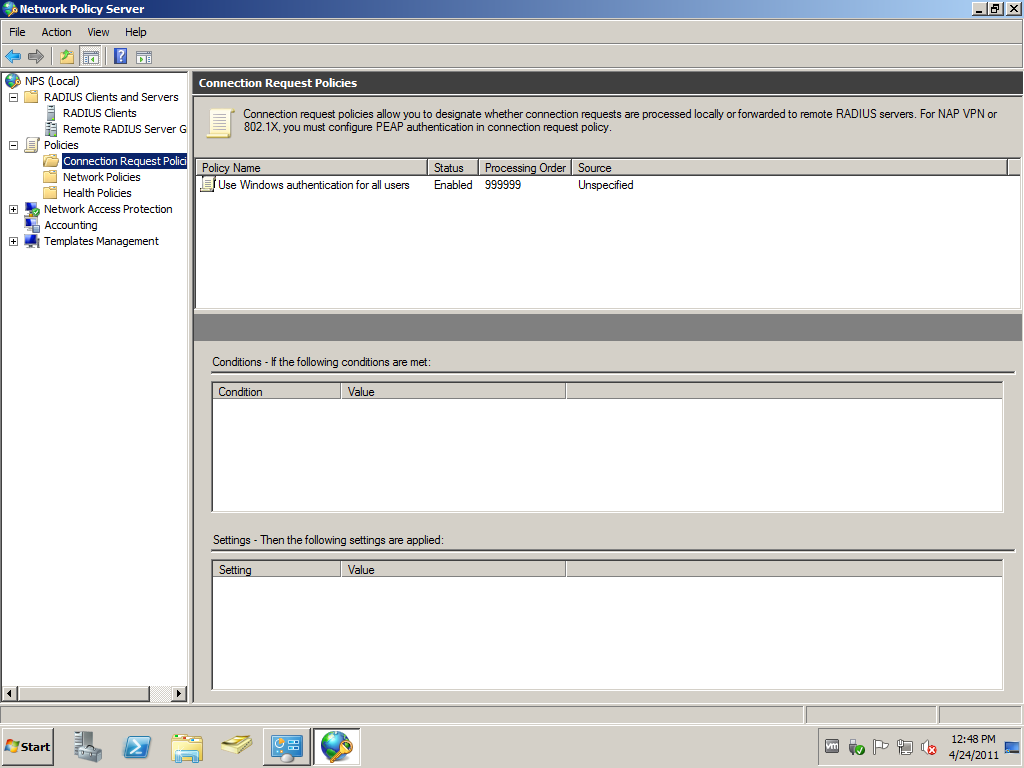
We won’t configure additional Connection request Polies.

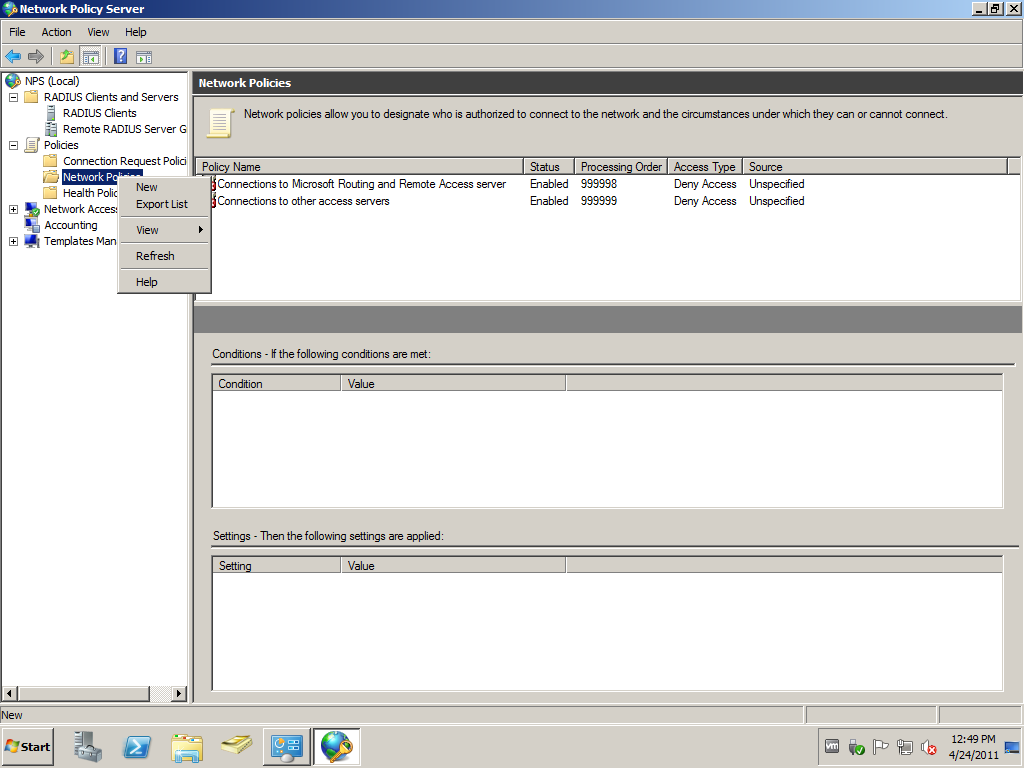
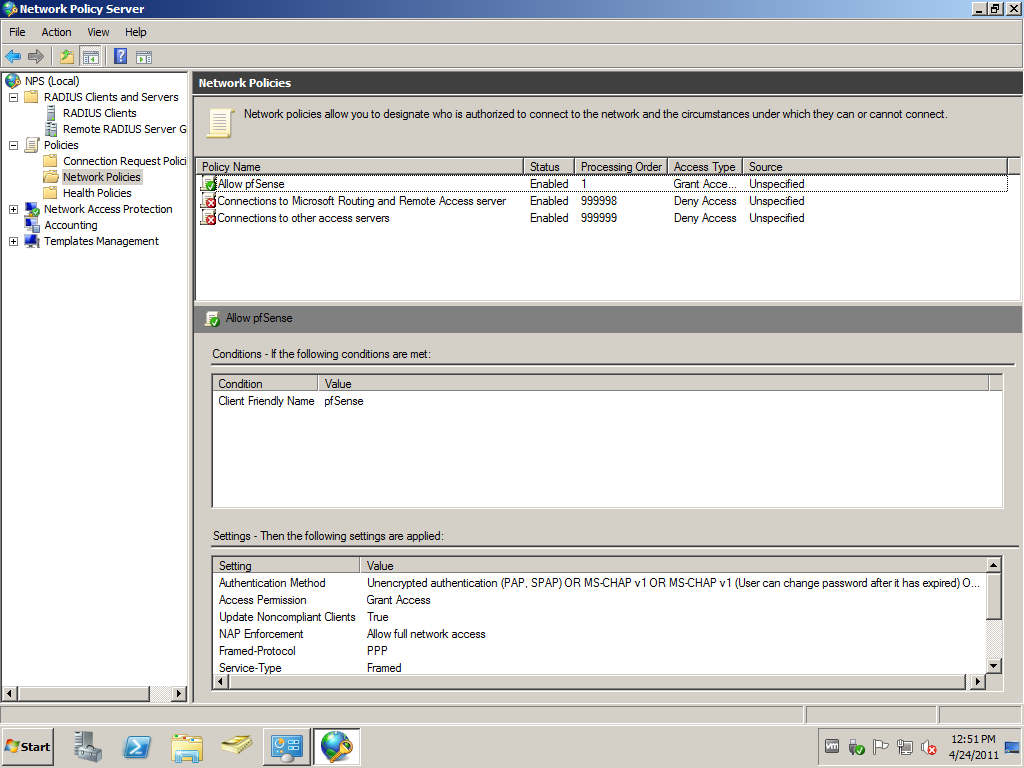
A new Network Policy is needed, because the default Connections to other access servers block requests send by pfSense.

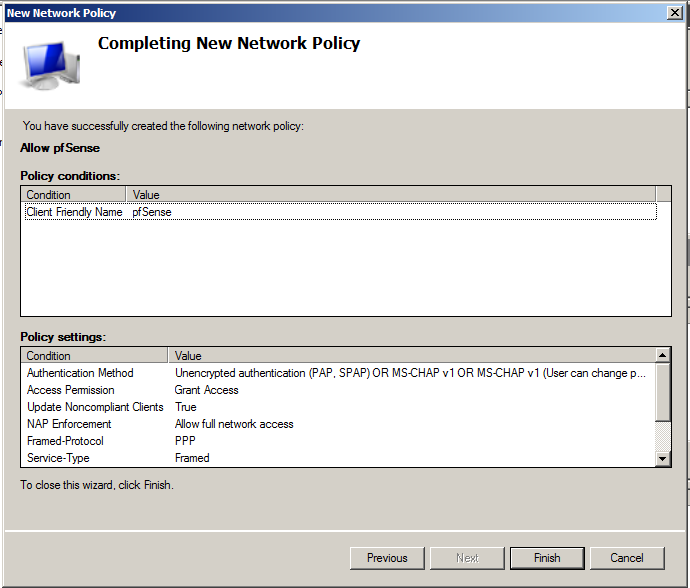
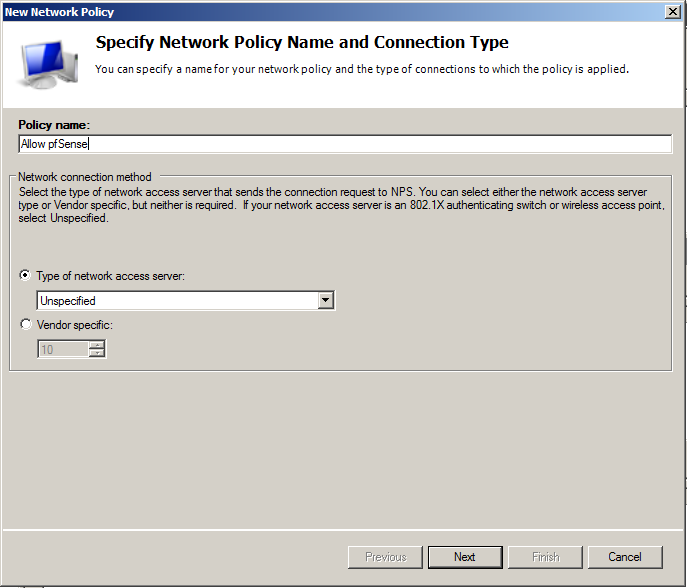
Enter Policy name of your preference, and leave the default Type of network access server to Unspecified. Otherwise your authentication request will be denied.
For Condition, let’s add the Client Friendly Name. In our case the client is our pfSense router. Type in here the Friendly name that you used in the RADIUS Client configuration. In our case pfSense.

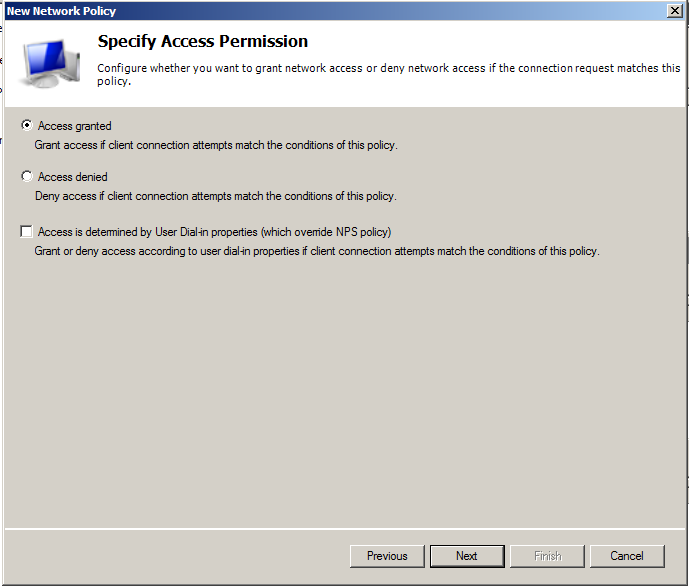
On Specify Access Permission, leave Access granted.

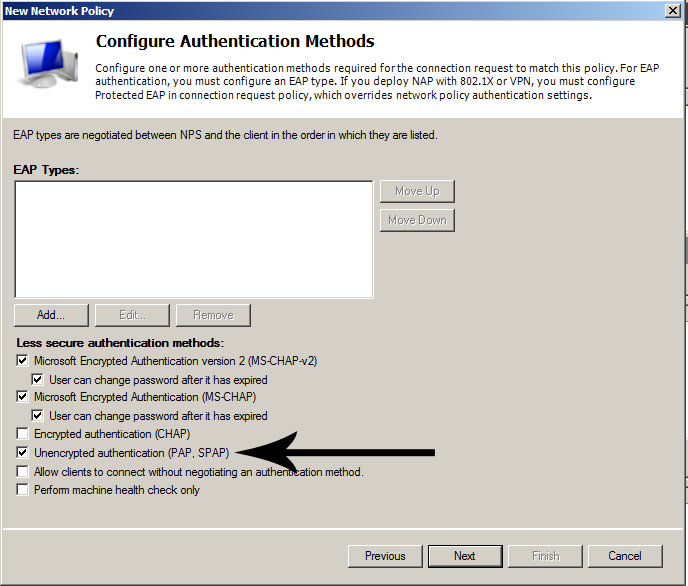
As Authentication Methods add Unencrypted authentication (PAP, SPAP). The explanation follows later.
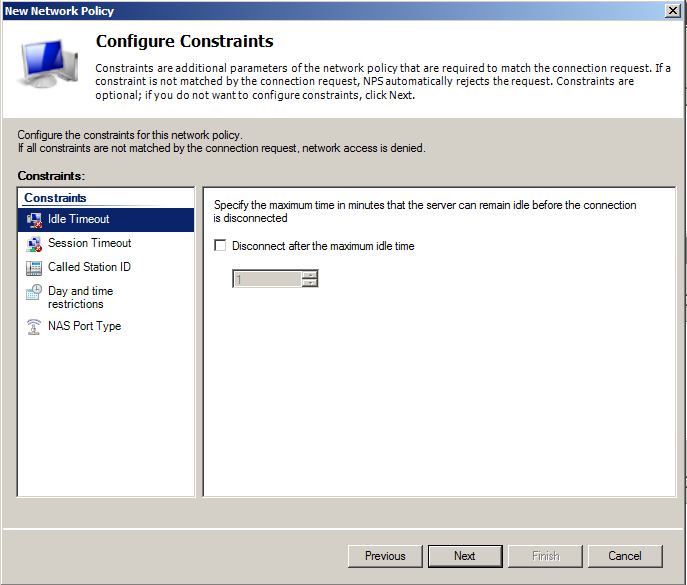
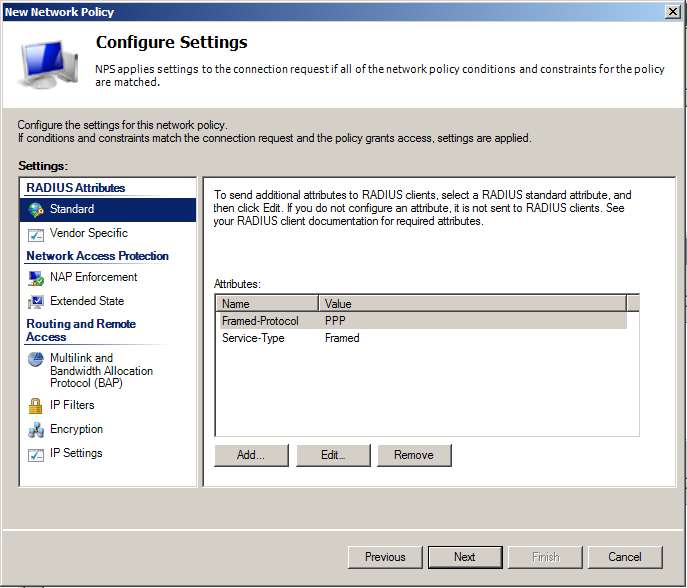
Leave constraints to defaults, if you don’t have some specific requirements. The same is valid for Settings too.

All done

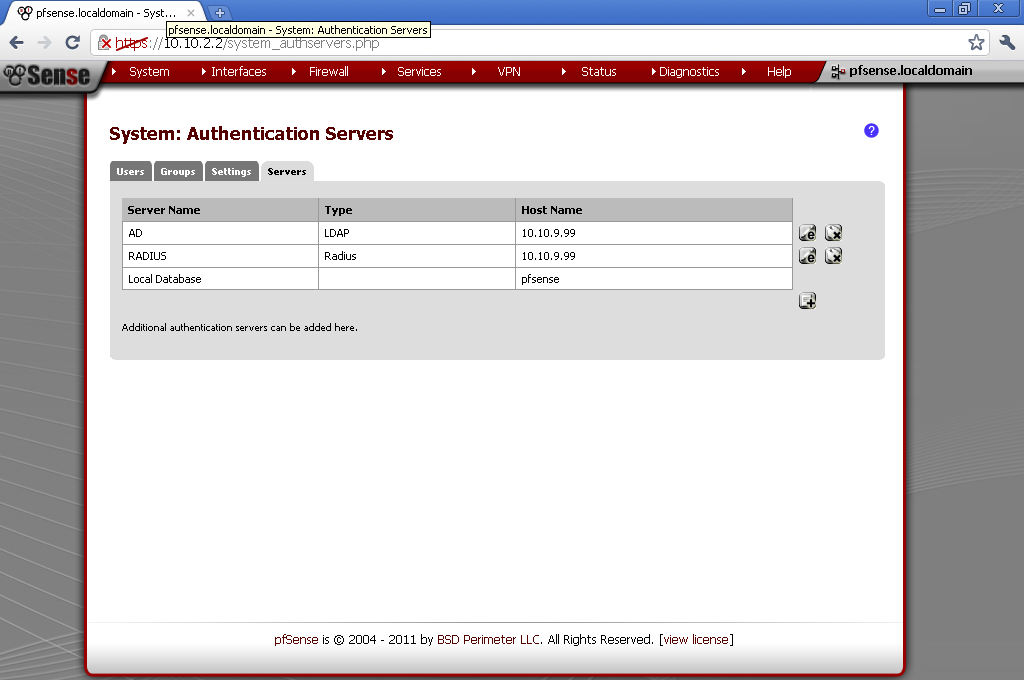
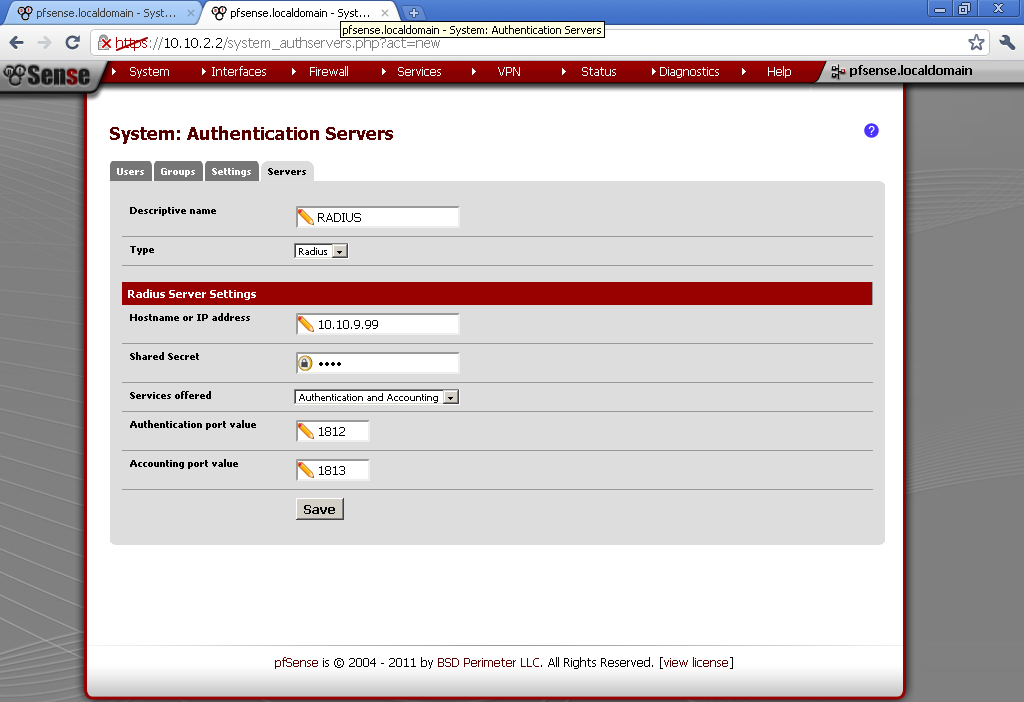
On your pfSense go to System > User Management > Servers add new.

Enter descriptive name of your liking. As type select Radius. Enter the IP address of the server that we just configure to be our RADIUS server. Under Services offered, leave the default Authentication and Accounting. Take note that we have not configured accounting on our NPS service, but you could easily enable it. The default ports are fine. If you have Windows Firewall, or some other kind of firewall service running, make sure required ports are open.

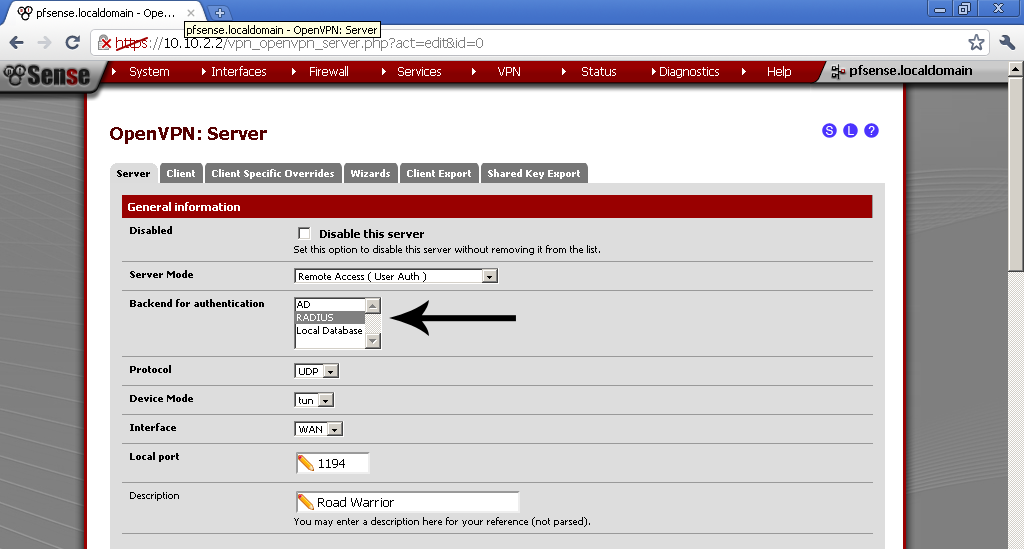
It is time to go to your OpenVPN Server configuration and select our new RADIUS provider as Backend for authentication.

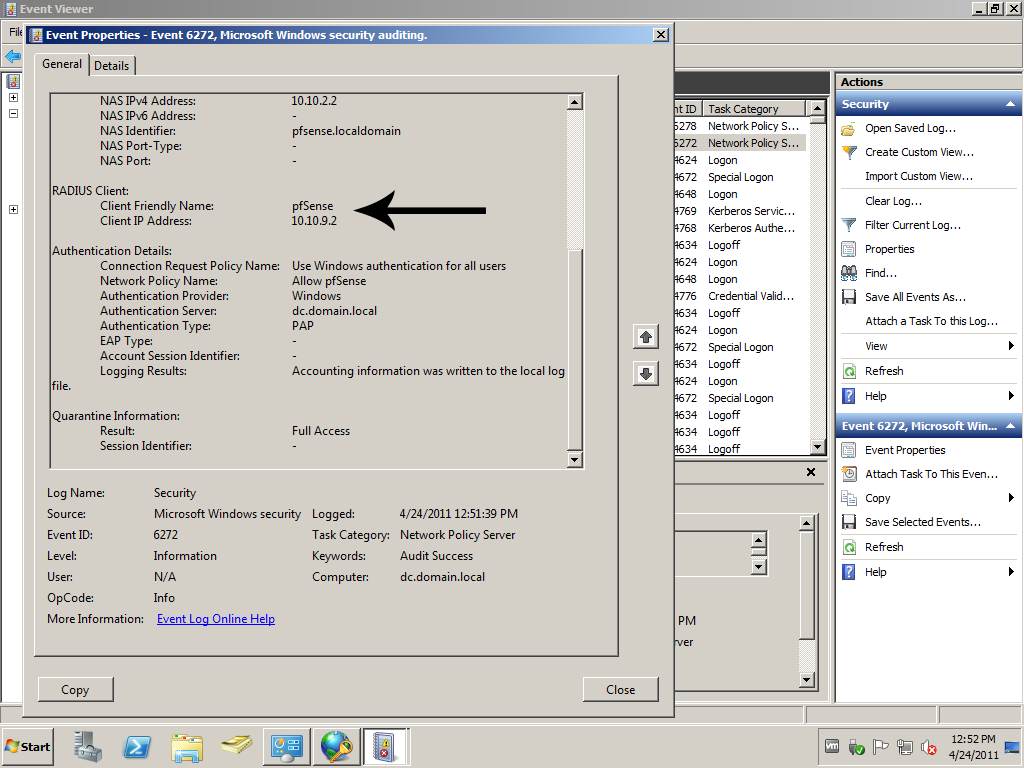
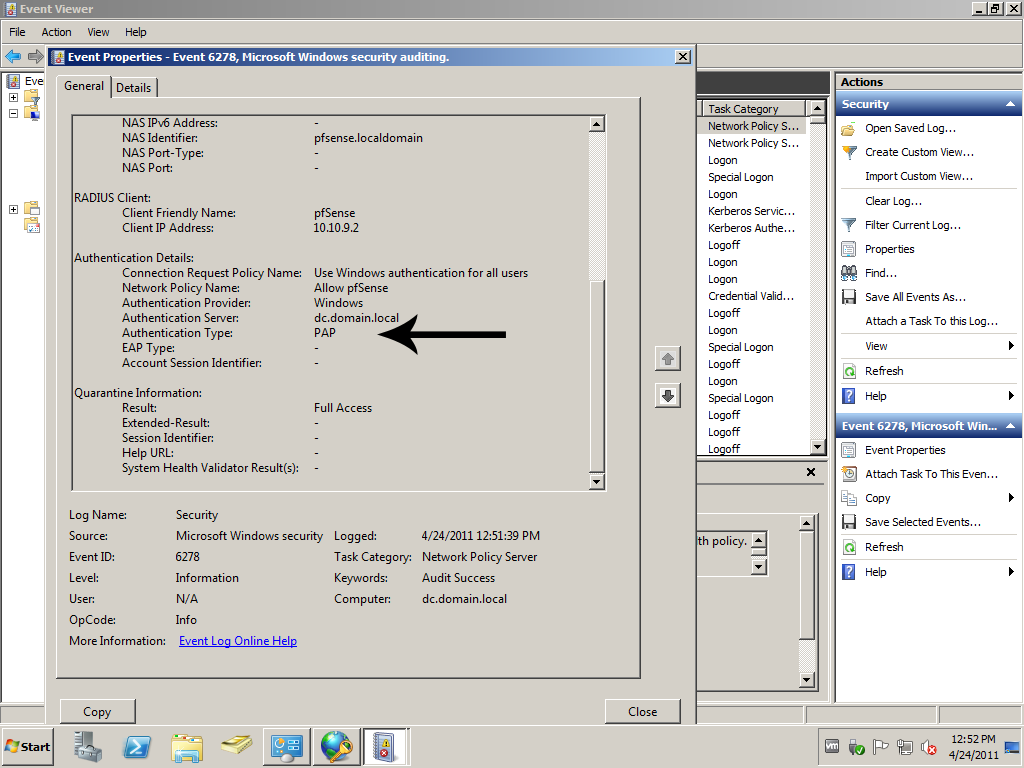
Now if you make test connection with test user, take a look at the security logs on the RADIUS server.

You will see RADIUS Client Friendly Name match out configuration, and which Policies were used,and that the Authentication Type is PAP, that is why we added it to the policy earlier.
That’s it.

Posted in TechnicalTagged ADDS, OpenVPN, pfSense, RADIUS, Windows Server 2008 R25 Comments

OpenVPN with LDAP authentication on pfSense 2.0 RC1

Posted on 22/04/2011 - 18/02/2019 by Stefan

In the last post I’ve used Local User Database for authentication with the OpenVPN Server, but managing users in multiple places is redundant and should be avoided. If your users resides in Windows Domain why not use a Domain Controller for authenticating VPN users.

That’s way now we will use Active Directory.

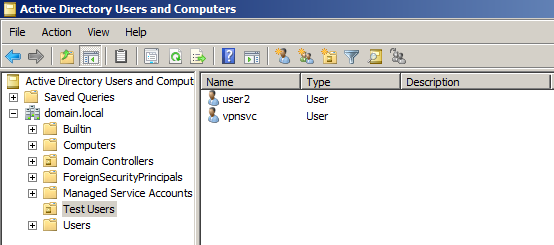
For the purpose I’ve setup a Windows Server with Active Directory Domain Services. In a new Organization Unit called Test Users, there are a service account (domain\vpnsvc), and user account with witch we’ll do the tests (domain\user2).

On the pfSense go to System > User Manager > Servers


Add new one with the + sign button.

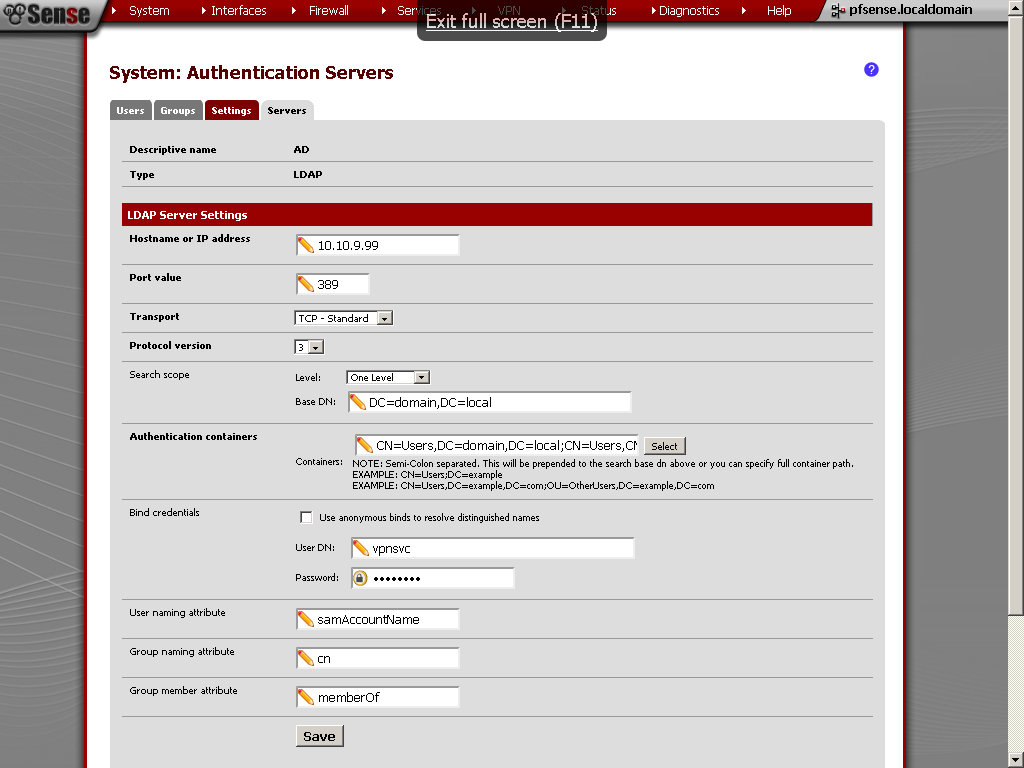
For Type select LDAP
Enter the IP address of your Domain Controller


In the Search scope, you have to enter the Base DN, you can find it by using ADSI Edit.


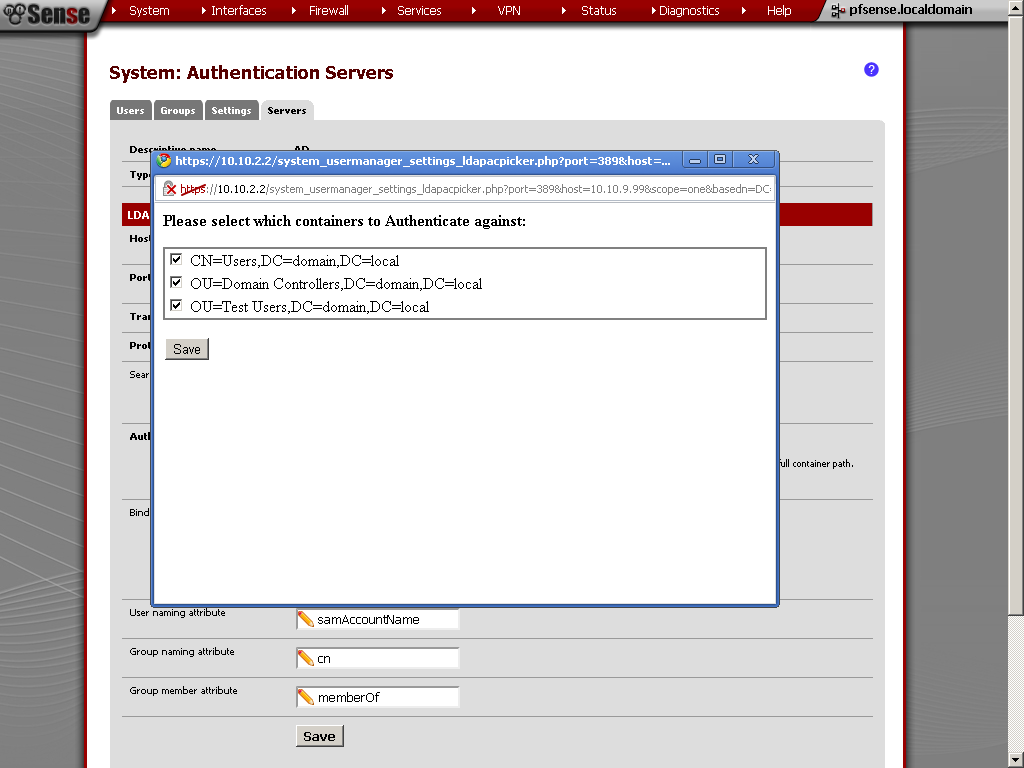
Now for Authentication containers, click on Select button and choose the ones in which users that will have access through VPN are.


Remove the tick from Use anonymous binds to resolve distinguished names, and enter the credentials for your service account. In my case this is the domain\vpnsvc service account.
For initial Template select Microsoft AD

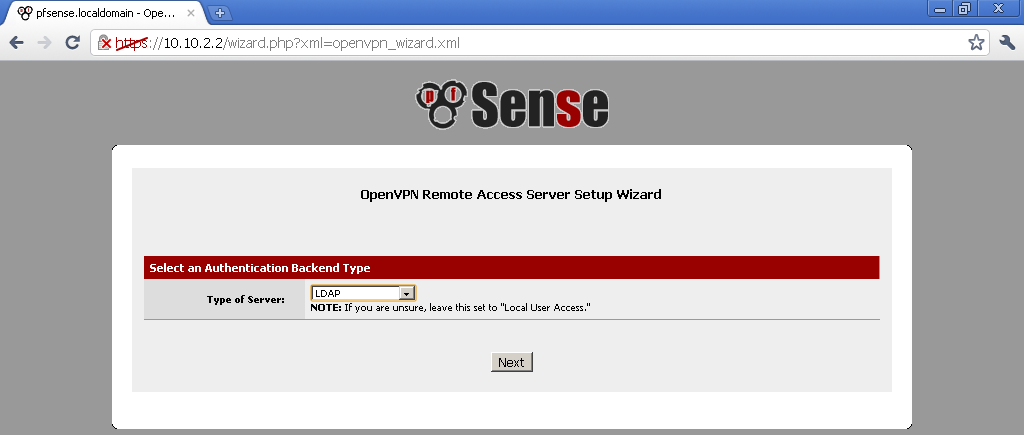
Now on the Wizard for creating new OpenVPN Server
As Type of Server select LDAP

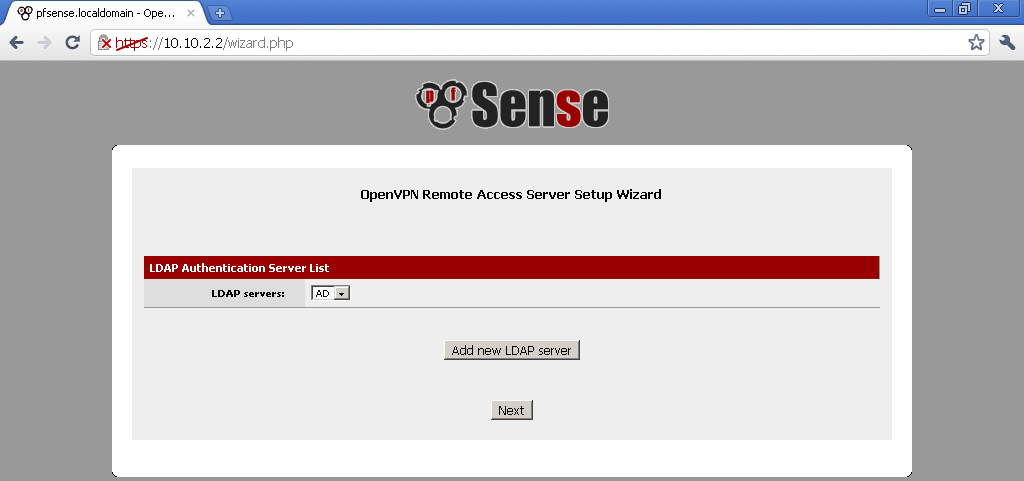
As a LDAP server, select the connection that we have configured just now.

Continue with the configuration of the OpenVPN server as usual, for references you can check my previous blog post on the topic pfSense 2.0 RC1 configuration of OpenVPN Server for Road Warrior with TLS and User Authentication

Now you can connect to the VPN using domain users account, in my example domain\user2.

I’ve test is and now if you disable some user account in Active Directory, you will not authenticate with the AD, and consequently connect to the OpenVPN.

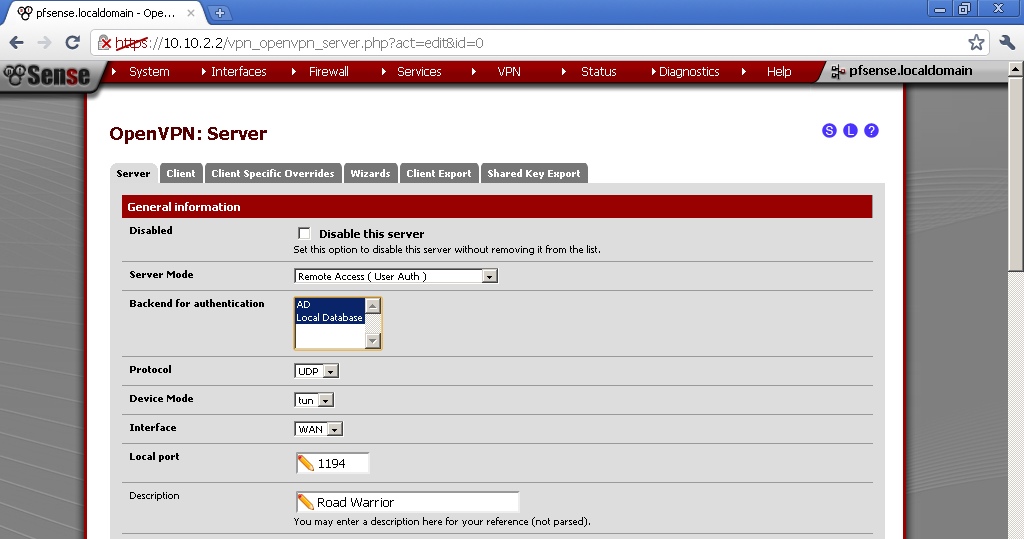
To extend the configuration you can use multiple backend service to authenticate. Open you OpenVPN server configuration and in the section Backend for authentication select also the Local Database, or any other available to you. There is a little flow in this method. If you have a user with the same user name and the same password, the request is send first to the AD and after that the local database is queried for the user. I’ve guessed it after a little network sniffing. However how often would you have duplicate users in both databases at the same time? So this is just for your information.

Thank you for reading, have fun.

Posted in TechnicalTagged ADDS, LDAP, OpenVPN, pfSense, Windows Server 2008 R217 Comments

pfSense 2.0 RC1 released, on Hyper-V

Posted on 01/03/2011 - 18/02/2019 by Stefan

Today pfSense 2.0 RC1 was officially released. So I’ve quickly downloaded it and setup one test VM in VMWare. The new interface reveals a lot more features than the previous version 1.2.3. For full list of improvements look here: http://doc.pfsense.org/index.php/2.0_New_Features_and_Changes

What I was more interested in was the performance on Hyper-V VM. Recently I’ve setup a Hyper-V VM with 1.2.3 version and legacy network interface cards. Make a few quick file transfer tests and did not like the performance.

I’ve repeat the tests, and there is a 25% improvement over 1.2.3. This is encouraging. Unfortunately event with the new version, it is necessary to use Legacy NIC for the Hyper-V VM.

As it is stated in the Digest this is considered a stable release suitable for production use. I will continue the testing in production environment to get more realistic results.

Posted in TechnicalTagged Hyper-V, pfSense, Windows Server 2008 R2

pfSense 1.2.3 as Virtual Machine on Windows Server 2008 R2 Hyper-V

Posted on 27/02/2011 - 18/02/2019 by Stefan

After seeing pfSense working more than half year flawlessly on Alix, recently I’ve test it as virtual machine.

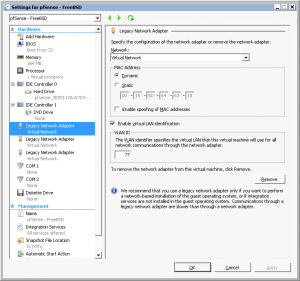
To avoid some compatibility issues a “Legacy Network Adapters” must be used.

For my surprise even with that trick, there was no network connectivity. The work around for this problem is explained in this thread: Pfsense 2.0-BETA4 in Hyper-V: Throughput not as expected

Open shell from the console, create new document

vi /usr/local/etc/rc.d/startup.sh

and type in

ifconfig de1 down
ifconfig de0 down
ifconfig de0 up
ifconfig de1 up

Just check before that the names of your interfaces, mine were de0,1.

For now it is stable, no issues, with very basic configuration. On the forums there are topics about possible problems with VLANs, but I didn’t need this functionality.

Posted in TechnicalTagged Hyper-V, Microsoft, Network, pfSense, Windows Server 2008 R22 Comments

Tags

ADDS AES-NI Asterisk ASUS Azure Captive Portal Cell Phone CentOS Certification Creative DD-WRT DNS Hyper-V LDAP Learning Linksys Microsoft Mikrotik RouterBoard RB250G Network OpenLDAP OpenVPN OpenWrt pfCenter pfSemse pfSense pfSense 2.0 RC1 pfSense 2.0 RC3 pfSense 2.2 PKI RADIUS Raspberry Pi Routing Site To Site Technical Uncategorized VLAN VMWare VoIP Vyatta Web Sites Windows Server 8 Windows Server 2008 R2 Windows Server 2012 R2 Wireless Workstation 8

Archives

  • April 2020
  • July 2019
  • May 2019
  • March 2019
  • February 2019
  • October 2018
  • August 2018
  • March 2016
  • April 2015
  • March 2015
  • January 2015
  • February 2012
  • October 2011
  • September 2011
  • August 2011
  • July 2011
  • June 2011
  • May 2011
  • April 2011
  • March 2011
  • February 2011
  • July 2010
Proudly powered by WordPress | Theme: micro, developed by DevriX.