Introduction
After we have setup Captive Portal and customized the pages in the previous posts. Now let’s wrap it up with the other two authentication methods. In this article we are going to configure RADIUS authentication for users, and create Vouchers for our Guests.
Scenario
In the previous post pfSense 2.0 RC1 – Configure Captive Portal for Guests, we used Local User Manager for authentication. But managing users in multiple systems can be dull task. For that reason we could provide our Users with a way to use their Active Directory user accounts to authenticate against the Captive Portal.
For our Guest We can create one Guest user account in Active Directory, but a better solution would be to provide them with one time use Voucher, that can be dispose of at the end of day.
Setup
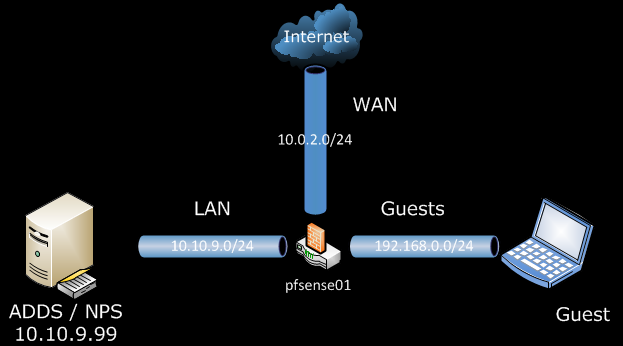
The only change from our previous setup is the use of one Windows Server 2008 R2, with Active Directory Domain Services and Network Policy Server roles.
Configuration
Network Policy Server (NPS) aka RADIUS Server, Configuration
We can reuse the setup of NPS from OpenVPN with RADIUS authentication on pfSense 2.0 RC1, up until the pfSense configuration. So I would not duplicate the steps here.
On the pfSense side:
Now go to the Services > Captive Portal
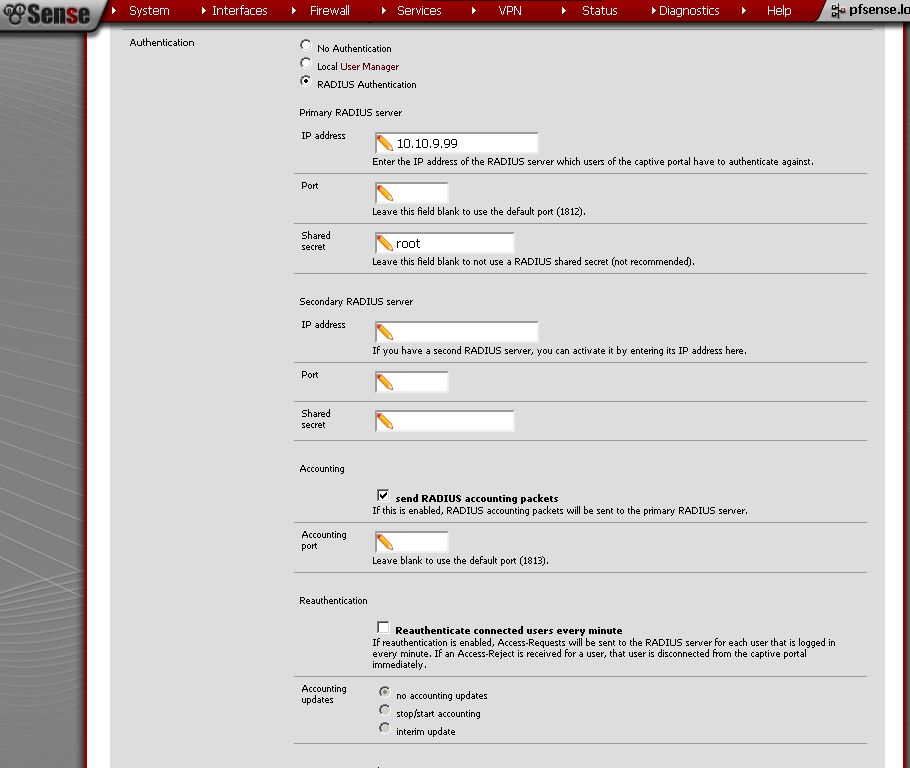
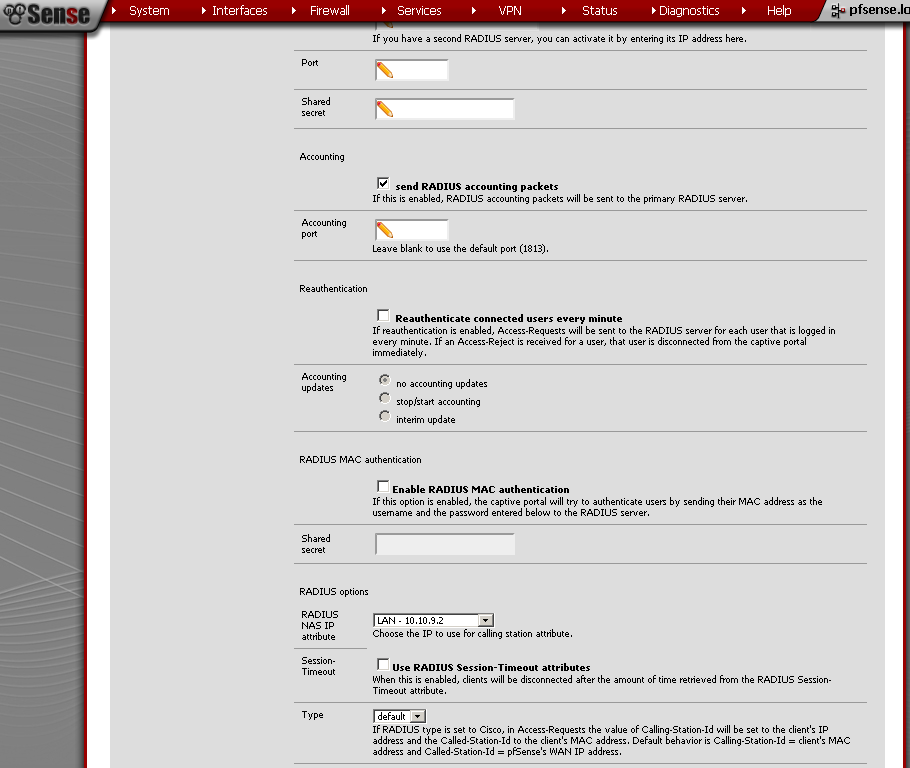
On the Captive Portal leaf, scroll down to the Authentication Section.
As Authentication choose RADIUS Autentication
Primary RADIUS server, IP address – 10.10.9.99
Enter Shared Secret
Optionally if you wish tick the send RADIUS accounting packets check box.
And under RADIUS options, RADIUS NAS IP Attribute, select the LAN interface. I presume that behind this interface is your RADIUS server.
Save the configuration.
Vouchers Configuration
The first time you Enable the Vouchers, a pair of RSA keys are generated for you automatically.

The pre generated RAS keys are 32 bits. For now we will use the default. But if you want to create 64 bit keys, you can check our the article Captive Portal Vouchers.
For the Save Interval, the default value is 5 minutes, but I do not want the state of the vouchers to be kept in my configuration file, so I’ll change it to 0. Leave the rest of the fields to default values. Save the configuration.


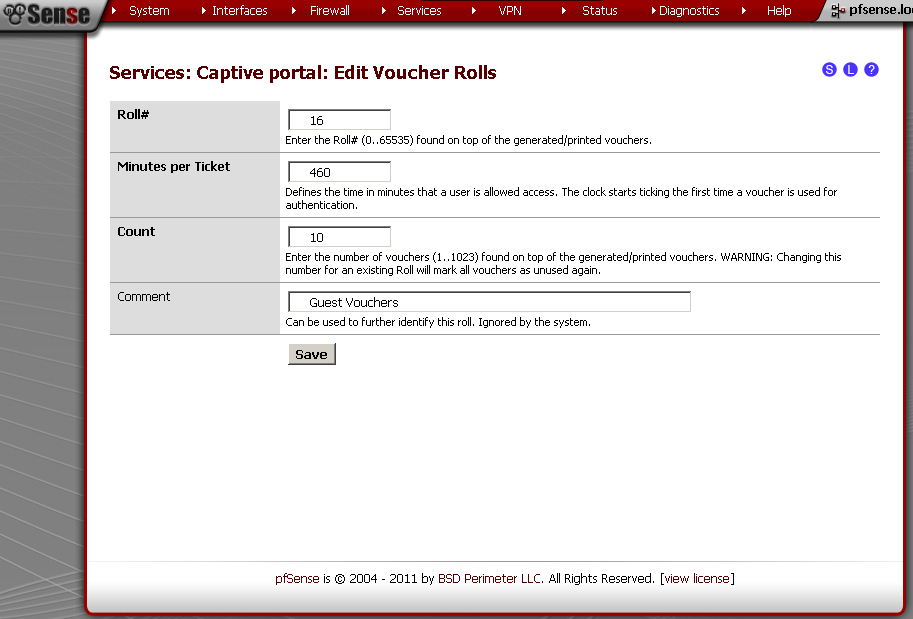
No let’s generate some vouchers, in the Voucher Rolls section, click on the “+” sign.

On the new page, enter
Roll# – 16, Minutes per Ticker – 460 (8 hours), Count – 10 this is the number of vouchers generated. You can put some comment for reference. Save it.
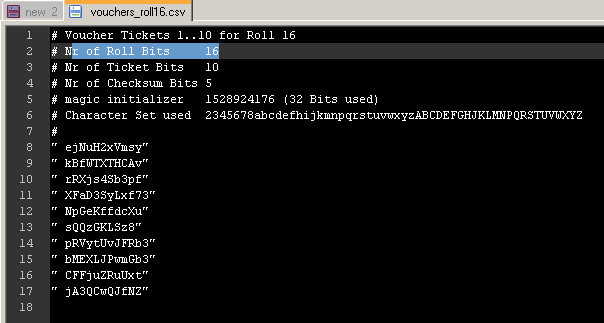
Upon return to the Vouchers leaf, click on the circle with “i” in it to export the list of vouchers.

The result should look similar to this:
Testing
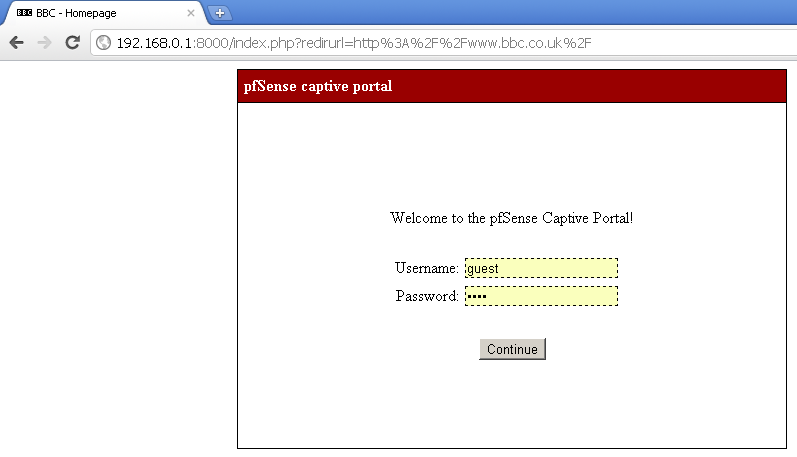
Open a browser on a computer connected to the Guest interface of pfSense, enter a web address, and you should be presented with the Captive Portal page.
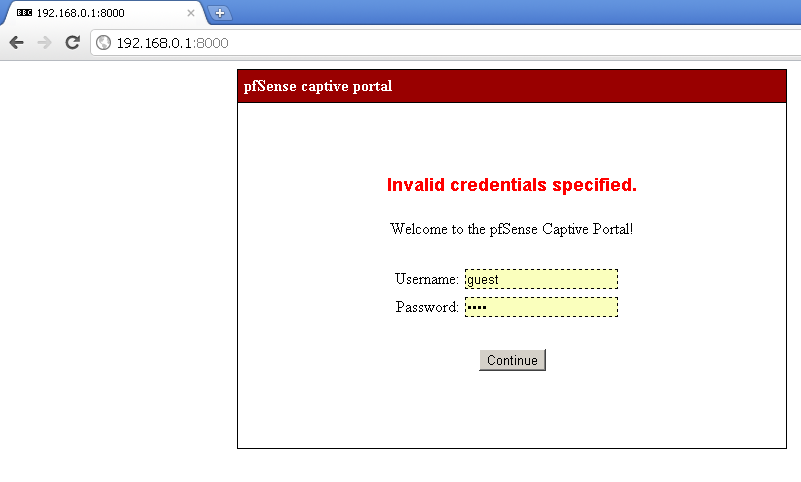
For RADIUS test , enter a user name and password, from the Active Directory, and you should successfuly log in.
For test of the Voucher system, copy one of the rows from the csv file, and paste it in the Voucher field.
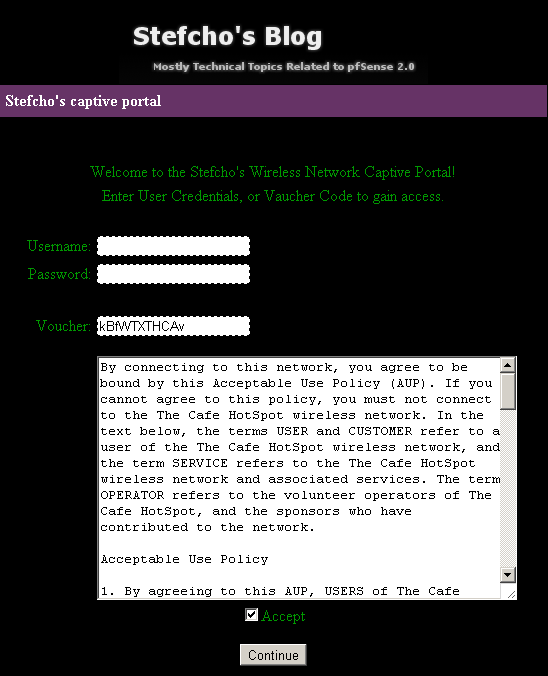
The web address that you typed should load, and you will have access for the next 8 hours.
On the web GUI, you could check that the user is successfuly connected.


References
http://doc.pfsense.org/index.php/Category:Captive_Portal
Aggregated all topics related to Captive Portal in pfSense Documentation
http://doc.pfsense.org/index.php/Captive_Portal_Vouchers
Specific article for the Vouchers
http://doc.m0n0.ch/handbook/captiveportal.html
m0n0wall documentation of the Captive Portal, can be used for cross references.
Conclusion
During the last three posts we look at the basic configuration of Captive Portal in pfSense 2.0 RC1. Also we customized the Portal pages, and used different authentication methods available. Using this feature of pfSense you can safely provide Internet access to your users and guests. Of course there are many other options that we have not covered, but they are left for future posts.
Thank you for reading, and I hope it was helpful.

