Skip to content

Stefcho's Tech Blog

Software Development, Cloud, DevOps and PfSense

Tag: pfSense 2.0 RC3

Using your OpenVPN Road Warrior setup as a Secure Relay

Posted on 07/09/2011 - 18/02/2019 by Stefan

Introduction

If you are in a café or another place with free wireless Internet access you are under a security risk. Your traffic can be monitored, captured and analysed. Your sensitive data can be stolen or your laptop infected with malicious application.

To avoid as much as possible of the above we can route all your traffic through the internet connection at home or in your office.

Configuration

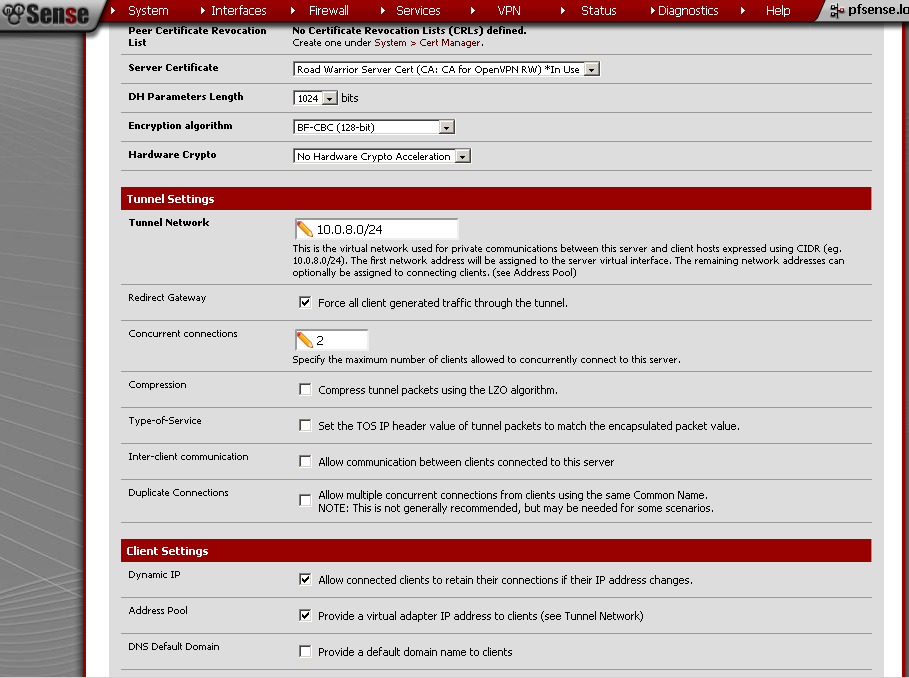
As a base configuration you can use pfSense 2.0 RC1 configuration of OpenVPN Server for Road Warrior with TLS and User Authentication

up until the Tunnel Settings section of the OpenVPN Configuration.

There tick the Redirect Gateway.


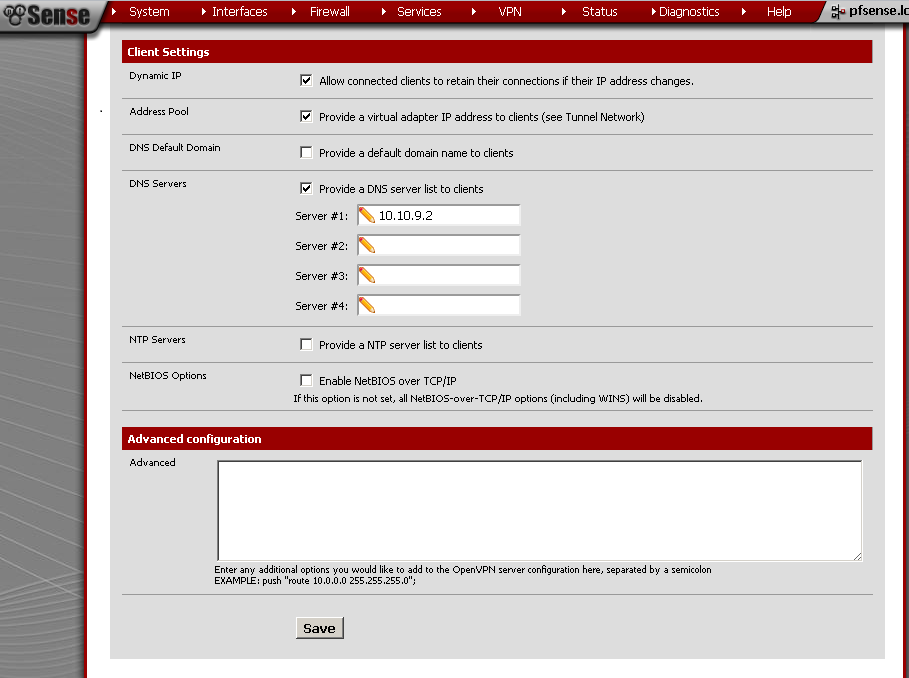
Under Client Settings enter DNS Server 1 as the IP address of you LAN interface.

Explanation

By doing so you will redirect all your traffic through the VPN connection and avoid the risks related to the publicly available Internet access hotspots. The addition of DNS server address is needed in order to use you own device to resolve web sites IPs instead of the publicly available DNS server of the hotspot.

Testing

As a test you can trace route (tracert bbc.co.uk for example) a popular internet site with or without established VPN Connection.

Conclusion

At the cost of building just another VPN Server on your device you are gaining a little peace of mind while surfing the net from insecure location.

Posted in TechnicalTagged Network, OpenVPN, pfSense, pfSense 2.0 RC3, Technical7 Comments

Upgrade Alix board with pfSense 1.2.3 to pfSense 2.0 RC3

Posted on 20/08/2011 - 18/02/2019 by Stefan

Introduction

After having  enough of tests with the RC3 in virtual environment, I decide to upgrade my pfSense 1.2.3 appliance running on Alix2d13. Considering my Dual WAN setup with load balancing and some other rules, I didn’t really want to lose any of my configurations during this process.

If I made in-place upgrade what is my rollback strategy?!

If I performed clean install and just restored configuration backup what are the guaranties that is will work. Of course I can test it in my virtual lab, but there are risks with the physical scenario that I can’t predict using this method. So I needed and alternative.

Scenario

I want to test upgrade my pfSense 1.2.3 to 2.0 RC3. For that purpose I need a reliable rollback plan with no data loss, and minimal operations required. How did I achieve it you can find in the Explanation section.

Setup

The setup is described in this post: SoHo Firewall Appliance with Alix2d13 and pfSense

,noting change there since.

Configuration

First I made a backup of the full configuration of the 1.2.3, you know just in case.

Then download the image file: pfSense-2.0-RC3-4g-i386-20110621-1821-nanobsd-upgrade.img.gz

And extract the image from the archive.

Now as it is described here: Installation on a standard PC (CF/IDE version)

We need the physdiskwrite tool to write the image to the Compact Flash (CF). I’ve used the

physdiskwrite 0.5.2 + PhysGUI

Then I plug in the new CF in the card reader make sure there are no portions on it using the Disk Management Console (Start > Run> diskmgmt.msc), otherwise you will receive error message like the one in the Issue section below.

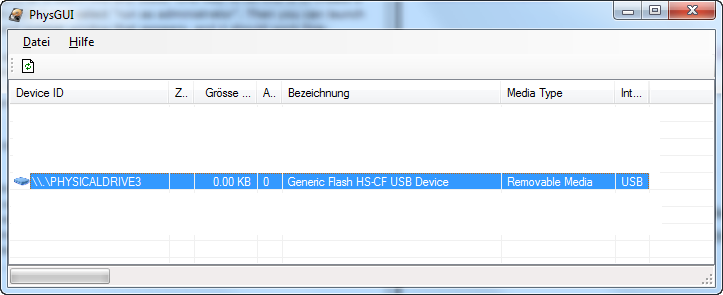
Then start physdiskwrite with PhysGUI, select the CF disk.
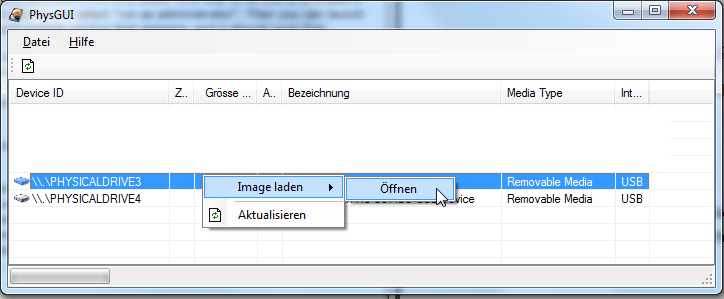
Right click on the disk select Image laden (Load Image), Offnen (Open). Brows to the extracted image and select it.
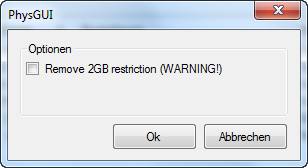
You will see this warning message window, tick the check box next to Remove 2GB restriction, mine is 8 Gigs, if your CF is smaller then don’t.
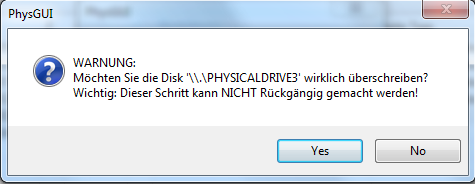
Yet another warning message windows, asking you if you really want to overwrite the disk with the image.
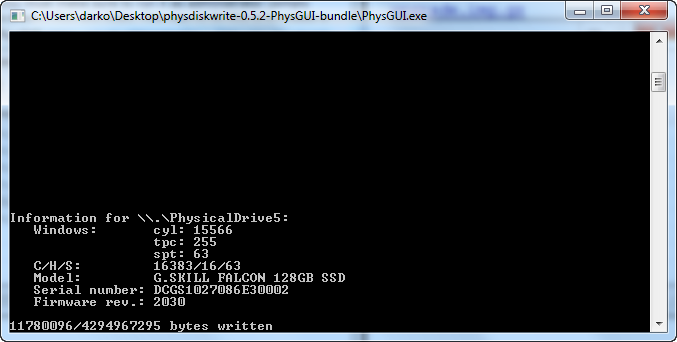
No you have about 20 – 30 minutes of waiting, so be patient, do some other stuff.
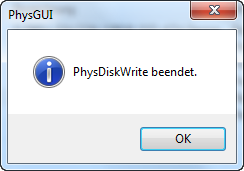
We are ready.
 

Explanation

Finally I get it, instead of changing the content of my original Compact Flash, why not get second one and use is for the tests instead? This way I can retain my original configuration and with just a swap of the cards be right back where I started.

Testing

After successful installation I’ve just swap the CFs and configured pfSense 2.0 RC3 using console cable.

Then using the WebGUI restored the backup configuration from the 1.2.3. Now it is time to check the functionality.

The Interface configuration like interfaced configuration was in place but the Load Balancing configuration was gone. Also my OpenVPN configurations were restored but in a non-working state. The firewall rules were applied but with the missing Load Balancer there was little use of them. After about half hour of checks, I decided to roll back to 1.2.3. Swap the CFs again and everything works the old way.

Issues

Writing to the CF card, As stated in Special considerations for Windows Vista/7

If you get write errors shortly after physdiskwrite has begun writing to the target disk (usually after 65536 bytes), this may be caused by existing partitions on the disk. Use the Disk Management utility (right-click on the “Computer” icon on the desktop and select Manage, then navigate to Computer Management (Local)/Storage) to delete all partitions on the target disk before starting physdiskwrite.

If you are unable to delete all the partitions with the Disk Management utility, try the following procedure:

1.     Open a command window as admin (“cmd”)

2.     Type “diskpart” and hit enter.

3.     Type “list disk” and hit enter to find out the number of your drive.

4.     Type “select disk X” (where you replace X with the number of your drive) and hit enter.

5.     Type “clean” and hit enter.


So I had to clean the disk first but it was a breezy task. Then everything was alright.

Conclusion

Up until the restoration of the configuration backup everything is ok. Now I have to test the restoration in my lab, or better yet reproduce my original configuration there. I ought to think for the second alternative more.

To configure everything in the lab and then just backup and restore the configuration from the same one and the same version sound reasonable to me. Better yet I will know that it works.

I’ll have to test Dual WAN in fail-over configuration, then test recreate my OpenVPN configurations, and test all the rules that I have applied.

Posted in TechnicalTagged pfSense, pfSense 2.0 RC33 Comments

OpenVPN on pfSense 2.0 RC3 with OpenLDAP Authentication on CentOS 5.6

Posted on 13/08/2011 - 18/02/2019 by Stefan

Introduction

After writing OpenVPN with LDAP authentication on pfSense 2.0 RC1, a reader of my blog shared some problems with configuring OpenLDAP on CentOS.  So I decide to build such a setup and test.

Scenario

The scenario is as follows, authenticating users requiring access to the OpenVPN server against OpenLDAP service running on CentOS.

Setup

I’ve spent most time in preparing the CentOS server. Initially my decision was to use CentOS 6.0, but after a few failed attempts to configure it and the absence of how to guides for this purpose, I’ve decided to fall back to 5.6.

For this version there is a wonderful how to guide here:

OpenLDAP on CentOS 5.6

Install And Configure OpenLDAP 2.4.25 On CentOS 5.6

Following this instructions I’ve managed to setup OpenLDAP very fast.  The only comment that I have is in this section:

All data loaded is in LDIF format. Create a file to initialize the LDAP database:

# vi ldap-init.ldif

dn: dc=mycompany,dc=com

objectclass: dcObject

objectclass: organization

o: Example

dc: mycompany

dn: cn=Admin,dc=mycompany,dc=com

objectclass: organizationalRole

cn: Admin


you have to have one new row, otherwise the import in the next step fails. So the above should look like:

# vi ldap-init.ldif

dn: dc=mycompany,dc=com

objectclass: dcObject

objectclass: organization

o: Example

dc: mycompany


dn: cn=Admin,dc=mycompany,dc=com

objectclass: organizationalRole

cn: Admin


Next step is to create a few test users.  For that purpose I’ve used :

LDAP Admin

Ldap Admin is free Win32 administration tool for LDAP directory management. This application lets you browse, search, modify, create and delete objects on LDAP server. It also supports more complex operations such as directory copy and move between remote servers and extends the common edit functions to support specific object types (such as groups and accounts).

You can use it to manage Posix groups and accounts, Samba accounts and it even includes support for Postfix MTA. Ldap Admin is free Open Source software distributed under the GNU General Public License.

Configuration

It is time to configure the pfSense. I will skip all the steps described in the previous posts. You can find them here:

pfSense 2.0 RC1 configuration of OpenVPN Server for Road Warrior with TLS and User Authentication

OpenVPN with LDAP authentication on pfSense 2.0 RC1

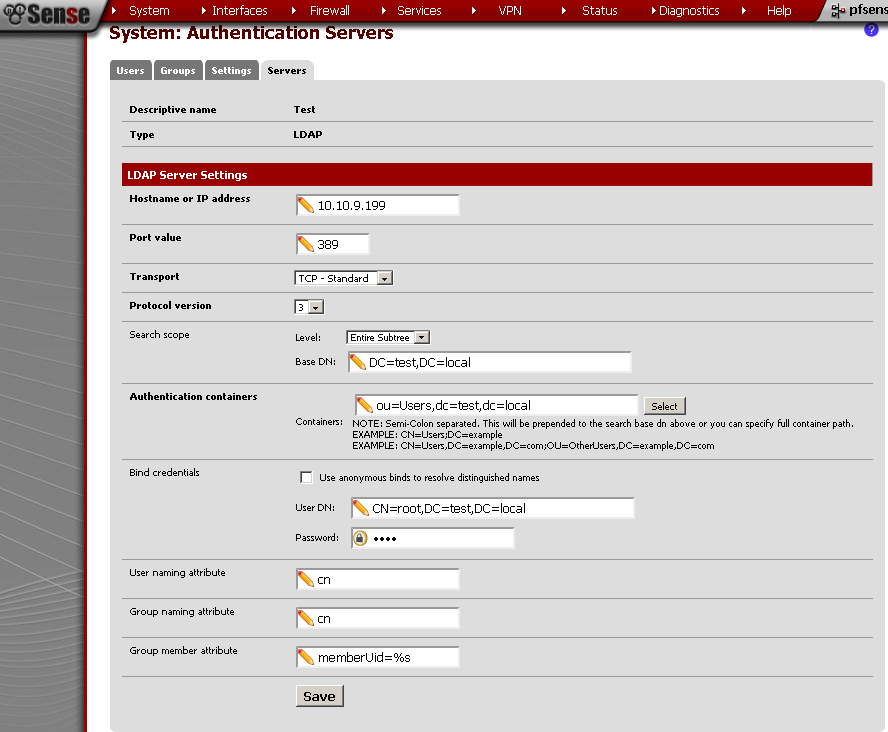
Now let’s get straight to System > User Manager and on the Servers leaf.

Hostname or IP address: this it the address of the CentOS server

Base DN: this is the domain name

Authentication container: after insterted the Bind credentials, it was visible, but when I’ve click on the Save button, nothing happen. So I’ve typed it in manually.

Bind Credentials: enter User DN and Password. , I’ve tested it and with Use anonymous binds to resolve distinguished names, it works also.

Group Member Attribute: you can modify this with the Uid=%s, if you need.

Testing

Just for reference this is my test user.

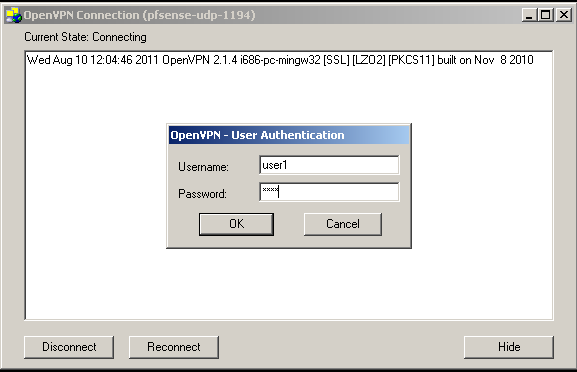
After preforming the OpenVPN configuration, enter the user name and the password.

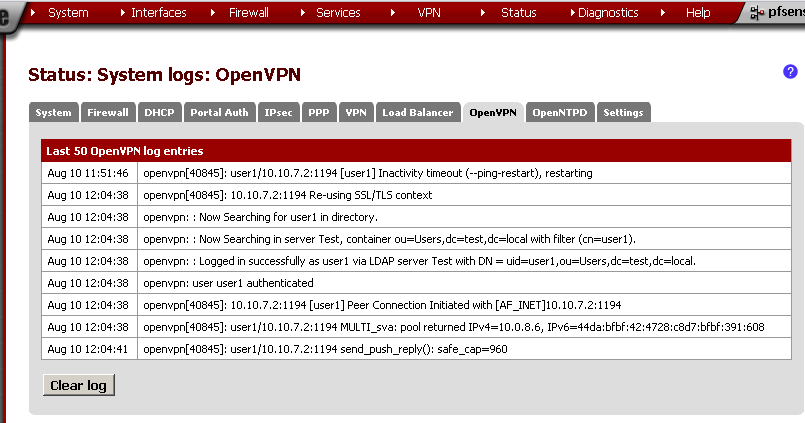
If everything is OK, you should be successfully connected and see something similar in the OpenVPN logs:

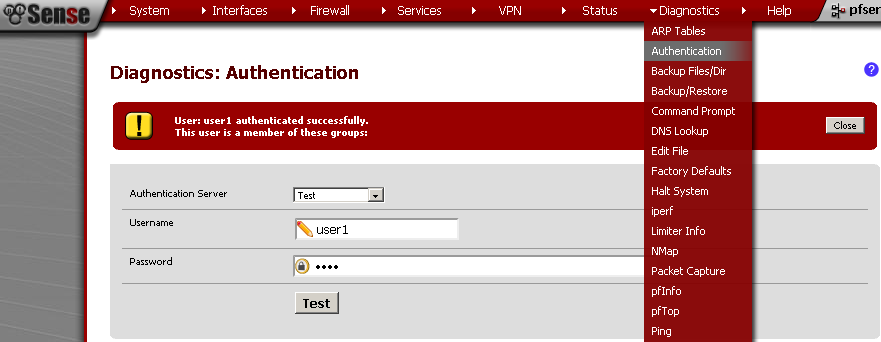
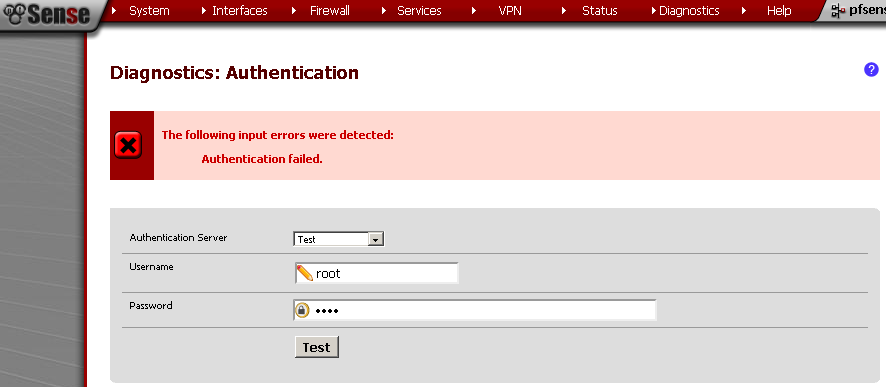
You can also test the connection using the Diagnostics > Authentication, Select the Authentication Server, in my case the CentOS OpenLDAP connection is named Test. Enter Username and Password, and see the result.

If you get error, you can check the Status> System Logs on the System leaf for errors.

I’ve got this error when the CentOS server was turn off.

Issues

The issues that I faced was the problem with selecting the OU in which my users resides. Hope this will be fixed in future versions. On the CentOS side the problems were releted with the changes of OpenLDAP in the 6.0 version.

Conclusion

That’s it. Thank you for reading.

Posted in TechnicalTagged CentOS, LDAP, OpenLDAP, OpenVPN, pfSense, pfSense 2.0 RC3, Technical2 Comments

Install Open VM Tools package on pfSense 2.0 RC3 for VMWare

Posted on 30/07/2011 - 18/02/2019 by Stefan

In my previous posts we’ve Install pfSense 2.0 RC1 on VMWare Workstation 7 and adjusted the memory of the Virtual Machines in pfSense 2.0 RC1 on VMware Workstation 7.1.4 – RAM size.

Now let’s continue with the setup of the Virtual Machine with the installation of VMware Tools for pfSense.

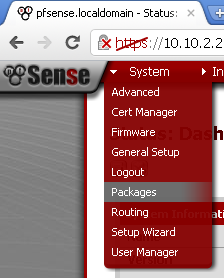
For that purpose go to System > Packages

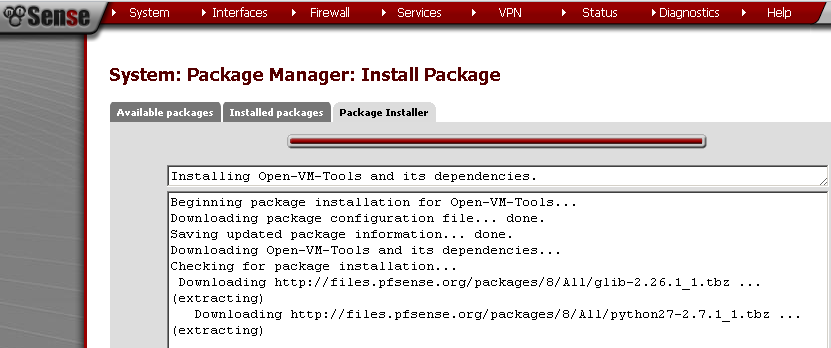
, and on the Available Packages find Open-VM-Tools. Click on the “+” next to it and start the installation.

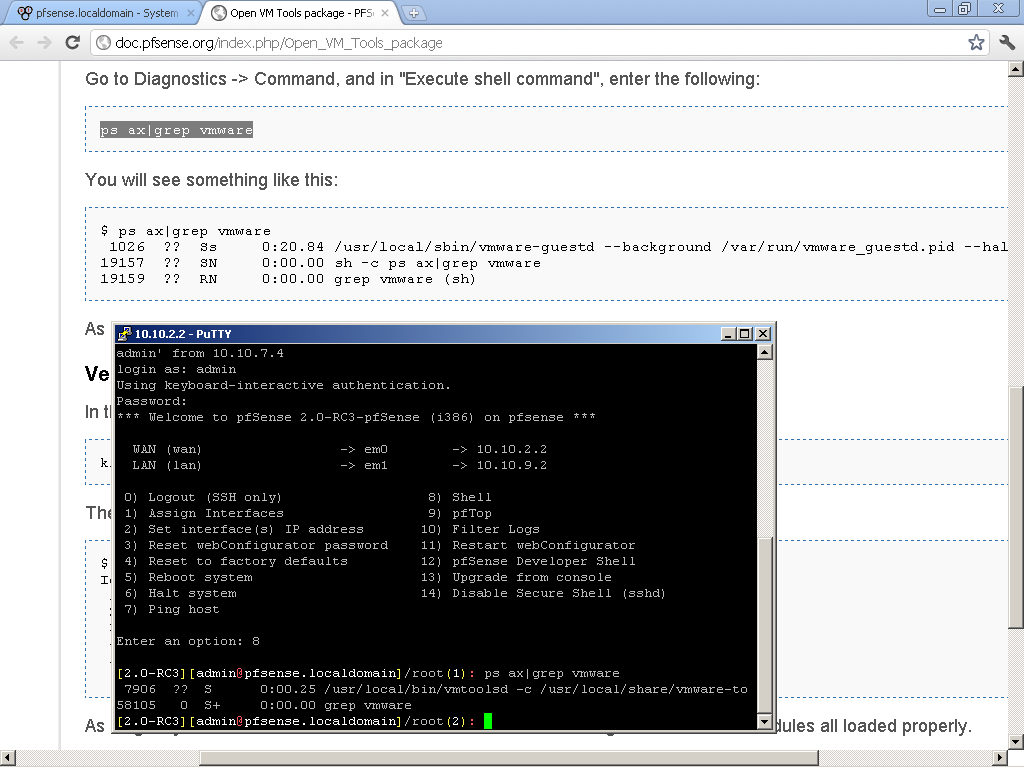
Wait it to finish, and on the Installed packages you should see it listed. Click on the link below Package Info, to see the instructions how to verify successful installation.

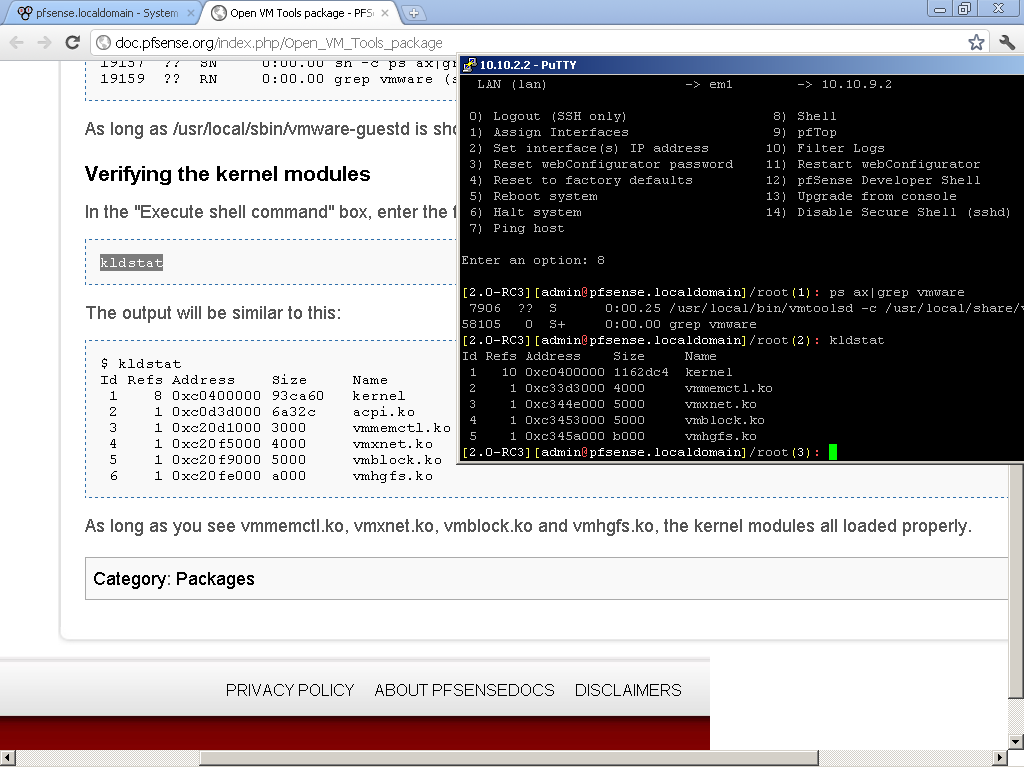
The operation boils down to connecting to the console and executing first and monitor the output.

ps ax|grep vmware


kldstat

That's it.
Posted in TechnicalTagged pfSense, pfSense 2.0 RC1, pfSense 2.0 RC3, Technical, VMWare1 Comment

Upgrade pfSense 2.0 from RC1 to RC3.

Posted on 23/07/2011 - 18/02/2019 by Stefan

In this post we will upgrade pfSense 2.0 from RC1 to RC3.

For the purpose go to this page with the news about the RC3 release:

2.0-RC3 now available!

and click on the Upgrades link: http://www.pfsense.org/mirror.php?section=updates

select a mirror and download the image that suits you, in my case it was:

pfSense-Full-Update-2.0-RC3-i386-20110621-1542.tgz

Now go to System > Firmware and click on Enable Firmware uploads.

Click on Choose File button, select the file that we just downloaded, and click on Upgrade Firmware button.

Wait for the firmware upgrade process complete.

That’s it. If you want more graphical representation, I’ve just uploaded a video here with the whole process.


Posted in TechnicalTagged Network, pfSense, pfSense 2.0 RC1, pfSense 2.0 RC3, Technical1 Comment

pfSense 2.0 RC3 released!

Posted on 22/06/2011 - 28/10/2018 by Stefan

Good news, today RC3 was released, is supposed to be the last RC before RTM which is very promising.

If the news are right we are waiting for RTM in a month, I hope that this is a realistic estimation for the time needed.

You can read the original news here

2.0-RC3 now available!

Downloads are available, I’m in process of upgrading my lab from RC1 to RC3. For that purpose I will user clean install and restore a configuration backup. Upgrading is not of my preference, but will eventually try it later on.


Posted in TechnicalTagged Network, pfSense, pfSense 2.0 RC3

Tags

ADDS AES-NI Asterisk ASUS Azure Captive Portal Cell Phone CentOS Certification Creative DD-WRT DNS Hyper-V LDAP Learning Linksys Microsoft Mikrotik RouterBoard RB250G Network OpenLDAP OpenVPN OpenWrt pfCenter pfSemse pfSense pfSense 2.0 RC1 pfSense 2.0 RC3 pfSense 2.2 PKI RADIUS Raspberry Pi Routing Site To Site Technical Uncategorized VLAN VMWare VoIP Vyatta Web Sites Windows Server 8 Windows Server 2008 R2 Windows Server 2012 R2 Wireless Workstation 8

Archives

  • April 2020
  • July 2019
  • May 2019
  • March 2019
  • February 2019
  • October 2018
  • August 2018
  • March 2016
  • April 2015
  • March 2015
  • January 2015
  • February 2012
  • October 2011
  • September 2011
  • August 2011
  • July 2011
  • June 2011
  • May 2011
  • April 2011
  • March 2011
  • February 2011
  • July 2010
Proudly powered by WordPress | Theme: micro, developed by DevriX.