Skip to content

Stefcho's Tech Blog

Software Development, Cloud, DevOps and PfSense

Tag: OpenVPN

Sharing a Port with OpenVPN and a Web Server

Posted on 04/03/2016 - 28/10/2018 by Stefan

Sharing a Port with OpenVPN and a Web Server

Routing your entire internet traffic over VPN when away from home is almost a must. Especially when using public WiFi hotspots or hotel internet.

Hello all, long time no see. I have a lot of other engagements lately and can’t reach to our beloved topic of pfSense. The fact that I don’t write new posts does not mean that I have abandoned it. Sometimes you have to put priorities to things in your life that are not as pleasant as other, but are just as much if not more important.

Enough said about that. Let’s get to the topic.

Recently I was visiting Asian country. As you probably know there are some places that some sites are restricted for access. It was a strange experience to not be able to open pages that you usually use every day. On other hand I would prefer to route all traffic over my Internet connection back at home when in a foreign country. Just as a protection.

So for test purposes I’ve setup an OpenVPN instance to check if I’m able to route all my traffic back home.

During my research I’ve came across very interesting article on the pfSense documentation. The article is: “Sharing a Port with OpenVPN and a Web Server”

It works and the only modification that has to be made to the OpenVPN server configuration are as follows:

  1. Set the protocol to TCP in the General Information sectionSharing a Port with OpenVPN and a Web Server 01
  2. Don’t forget to tick in the Tunnel Settings > Redirect Gateway

(Force all client generated traffic through the tunnel.)

Sharing a Port with OpenVPN and a Web Server 03

  1. In Advanced configuration section in Advanced field put the following:

port-share localhost 443Sharing a Port with OpenVPN and a Web Server 02

The old OpenVPN configuration instructions you can find here:

pfSense 2.0 RC1 configuration of OpenVPN Server for Road Warrior with TLS and User Authentication

Now you can connect to your pfSense / OpenVPN server on HTTPS and hopefully it would appear much like you are opening a page over SSL.

Have fun and as usual I don’t take any kind of responsibly for the way you use this setup, or any legal actions or consequences for that matter or related to it.

Posted in TechnicalTagged OpenVPN, pfSense

Using your OpenVPN Road Warrior setup as a Secure Relay

Posted on 07/09/2011 - 18/02/2019 by Stefan

Introduction

If you are in a café or another place with free wireless Internet access you are under a security risk. Your traffic can be monitored, captured and analysed. Your sensitive data can be stolen or your laptop infected with malicious application.

To avoid as much as possible of the above we can route all your traffic through the internet connection at home or in your office.

Configuration

As a base configuration you can use pfSense 2.0 RC1 configuration of OpenVPN Server for Road Warrior with TLS and User Authentication

up until the Tunnel Settings section of the OpenVPN Configuration.

There tick the Redirect Gateway.


Under Client Settings enter DNS Server 1 as the IP address of you LAN interface.

Explanation

By doing so you will redirect all your traffic through the VPN connection and avoid the risks related to the publicly available Internet access hotspots. The addition of DNS server address is needed in order to use you own device to resolve web sites IPs instead of the publicly available DNS server of the hotspot.

Testing

As a test you can trace route (tracert bbc.co.uk for example) a popular internet site with or without established VPN Connection.

Conclusion

At the cost of building just another VPN Server on your device you are gaining a little peace of mind while surfing the net from insecure location.

Posted in TechnicalTagged Network, OpenVPN, pfSense, pfSense 2.0 RC3, Technical7 Comments

OpenVPN on pfSense 2.0 RC3 with OpenLDAP Authentication on CentOS 5.6

Posted on 13/08/2011 - 18/02/2019 by Stefan

Introduction

After writing OpenVPN with LDAP authentication on pfSense 2.0 RC1, a reader of my blog shared some problems with configuring OpenLDAP on CentOS.  So I decide to build such a setup and test.

Scenario

The scenario is as follows, authenticating users requiring access to the OpenVPN server against OpenLDAP service running on CentOS.

Setup

I’ve spent most time in preparing the CentOS server. Initially my decision was to use CentOS 6.0, but after a few failed attempts to configure it and the absence of how to guides for this purpose, I’ve decided to fall back to 5.6.

For this version there is a wonderful how to guide here:

OpenLDAP on CentOS 5.6

Install And Configure OpenLDAP 2.4.25 On CentOS 5.6

Following this instructions I’ve managed to setup OpenLDAP very fast.  The only comment that I have is in this section:

All data loaded is in LDIF format. Create a file to initialize the LDAP database:

# vi ldap-init.ldif

dn: dc=mycompany,dc=com

objectclass: dcObject

objectclass: organization

o: Example

dc: mycompany

dn: cn=Admin,dc=mycompany,dc=com

objectclass: organizationalRole

cn: Admin


you have to have one new row, otherwise the import in the next step fails. So the above should look like:

# vi ldap-init.ldif

dn: dc=mycompany,dc=com

objectclass: dcObject

objectclass: organization

o: Example

dc: mycompany


dn: cn=Admin,dc=mycompany,dc=com

objectclass: organizationalRole

cn: Admin


Next step is to create a few test users.  For that purpose I’ve used :

LDAP Admin

Ldap Admin is free Win32 administration tool for LDAP directory management. This application lets you browse, search, modify, create and delete objects on LDAP server. It also supports more complex operations such as directory copy and move between remote servers and extends the common edit functions to support specific object types (such as groups and accounts).

You can use it to manage Posix groups and accounts, Samba accounts and it even includes support for Postfix MTA. Ldap Admin is free Open Source software distributed under the GNU General Public License.

Configuration

It is time to configure the pfSense. I will skip all the steps described in the previous posts. You can find them here:

pfSense 2.0 RC1 configuration of OpenVPN Server for Road Warrior with TLS and User Authentication

OpenVPN with LDAP authentication on pfSense 2.0 RC1

Now let’s get straight to System > User Manager and on the Servers leaf.

Hostname or IP address: this it the address of the CentOS server

Base DN: this is the domain name

Authentication container: after insterted the Bind credentials, it was visible, but when I’ve click on the Save button, nothing happen. So I’ve typed it in manually.

Bind Credentials: enter User DN and Password. , I’ve tested it and with Use anonymous binds to resolve distinguished names, it works also.

Group Member Attribute: you can modify this with the Uid=%s, if you need.

Testing

Just for reference this is my test user.

After preforming the OpenVPN configuration, enter the user name and the password.

If everything is OK, you should be successfully connected and see something similar in the OpenVPN logs:

You can also test the connection using the Diagnostics > Authentication, Select the Authentication Server, in my case the CentOS OpenLDAP connection is named Test. Enter Username and Password, and see the result.

If you get error, you can check the Status> System Logs on the System leaf for errors.

I’ve got this error when the CentOS server was turn off.

Issues

The issues that I faced was the problem with selecting the OU in which my users resides. Hope this will be fixed in future versions. On the CentOS side the problems were releted with the changes of OpenLDAP in the 6.0 version.

Conclusion

That’s it. Thank you for reading.

Posted in TechnicalTagged CentOS, LDAP, OpenLDAP, OpenVPN, pfSense, pfSense 2.0 RC3, Technical2 Comments

Routing Road Warrior’s clients through a Site-To-Site VPN with pfSense 2.0 RC1 and OpenVPN

Posted on 04/06/2011 - 18/02/2019 by Stefan

After we looked at the different options for Road Warrior and Site to Site configuration for OpenVPN on pfSense 2.0 RC1, now it is time to combine them in one solution.

Scenario

You have one or more Site to Site VPNs already and at least one Road Warrior setup for your users. Initially you are happy that you users can consume services from the site that hosts the Road Warrior, but then you want to give them access through the same connection to other sites connected to your main one.

Setup

Take a look at the network diagram.

pfSense01 serves the main site, and provides access to the remote users, but also has a site to site configuration with pfSense02.

If you are on the LAN (10.10.9.0/24) side behind pfSense01, you will be able to access machines through the Site to Site connection and communicate with machines on the other end, for example 10.10.10.99.

But if you are the VPN Client, you will be able to only access machines in the 10.10.9.0/24 network.

Our aim is to provide the VPN Client access to network behind pfSense02 (10.10.10.0/24) in addition to the 10.10.9.0/24 one.

Configuration

If you have already configured Road Warrior and Site To Site configuration skip to the Advanced Configuration section below.

Road Warrior

For reference how to configure it, you can look at my other posts, and choose depending on your needs:

pfSense 2.0 RC1 configuration of OpenVPN Server for Rad Warrior with TLS and User Authentication

OpenVPN with LDAP authentication on pfSense 2.0 RC1

OpenVPN with RADIUS authentication on pfSense 2.0 RC1


Site To Site

In case that you don’t have a site to site configuration ready, you can check out one of this posts:

Building Site to Site Connection with OpenVPN on pfSense 2.0 RC1 with Shared Key

Building Site to Site Connection with OpenVPN on pfSense 2.0 RC1 with PKI


Advanced Configuration

On pfSense 01,navigate to VPN > OpenVPN

on the Server leaf, in the Road Warrior configuration scroll down to the bottom section titled Advanced Configuration

and enter this line:

push “route 10.10.10.0 255.255.255.0”;


On pfSense 02, again navigate to VPN > OpenVPN, on the Client leaf, and open the Site To Site configuration

Scroll down to the bottom section titled Advanced Configuration, and enter this line:

route 10.123.45.0 255.255.255.0;

Explanation

As jimp explained in the thread mentioned below,

The push “route 10.10.10.0 255.255.255.0”; on the Road Warrior configuration tells the client that they can reach machines on the second site via the OpenVPN connection. While establishing connation OpenVPN Client adds an additional route to the second site.

The route 10.123.45.0 255.255.255.0; will instruct the second site how to answer on requests from the OpenVPN Client.

Testing

After you save the configuration changes, connect to the Road Warrior, and test you connectivity to machine on both sites.

References

While I was configuring similar setup, the routing part was new to me and I found it difficult to grasp at the time, but thanks to jimp’s help on the matter everything is crystal clear.
You can check out the thread in the pfSense forum here:
Topic: Routing Road Warrior to Site-To-Site, pfSense as OpenVPN client configuration

Posted in TechnicalTagged Network, OpenVPN, pfSense, Routing7 Comments

Packt Publishing OpenVPN 2 Cookbook Review

Posted on 22/05/2011 - 28/10/2018 by Stefan

OpenVPN 2 Cookbook

100 simple and incredibly effective recipes for harnessing the power of the OpenVPN 2 network
By Jan Just Keijser

OpenVPN 2 Cookbook

Introduction

I was approached by Packt Publishing representative, asking if I would be willing to make a review of this book. This was interesting because at that moment I was reading pfSense 2.0 Cookbook from the same publishing company. I was generously provided with the book, and here we are a month later.

The OpenVPN 2 Cookbook main subject is the use of OpenVPN in different scenarios. Its aim is to help you along the way of implementing an OpenVPN solution. For more detail description take a look at the detailed description Here.

My experience with OpenVPN is based on three years of different deployments. You can find more details at the bottom of this post.

What’s the book about?

The book is an in depth examination of OpenVPN and how to use is in your every work. If you are in a hurry you can find a quick fix in the huge amount of recipes, or read it from cover to cover and get extensive knowledge of OpenVPN, its capabilities and different usage scenarios.

The book states that prior knowledge and experience of system administration, TCP/IP is required, also in OpenVPN installation. The examples in the book are made mostly on Linux based systems, so prior knowledge in the field is required too.  If you are fresh to field, probably first step is to take a look at Beginning OpenVPN 2.0.9 and then continue with this book.

As the cover states: Quick answers to common problems.

The book is structured in twelve chapters, and each chapter consists of about eight to ten sub topics that are called recipes. These recipes are like short How Tos for a particular case. The valuable thing is that throughout the chapter the recipes build on each other, starting from very basic configuration to more advanced ones. To get an impression you can take a look at the Table of Contents.

Every recipe has a How it works sections. They are extremely useful to understand what and how is happening behind the scenes. And that’s not all, after this section additional value is provided in the There’s more sections, where additional explanations and further developments are delivered.

Does it achieve its promises?

The first topic that really gets me going was 3-way routing in the first chapter. I was planning to implement this for small number of fixed endpoints which are less than four. For more you have to read further in the book.

The next this that surprise me pleasantly was the PKI, Certificates and OpenSSL chapter. It helped me better understand OpenSSL and give me better idea how to manage certificates. This topic continues in the next chapters about Two-factor Authentication. I was very surprised to see that even hardware tokens can be used to authenticate users.

In The Scripting and Plugins, there is a very important secret about scripts execution, which was not known to me, and definitely will help me in future.

The Troubleshooting sections can save you precious blood, sweat and tears especially with problems related to Routing. Those are the two chapters I appreciate the most because they provide you with analytical way to diagnose and eliminate problems in deployments. You can have a peek in the sample chapter here: Troubleshooting OpenVPN: Configurations

Logically after you have fixed all the problems a Performance Tuning is your next step.

The following two chapters are related to OS integrations and advanced configuration. They help me better understand how to better integrate OpenVPN with the unique environment of the client.

The last chapter is all about the new features in 2.2 version of OpenVPN. It is quite useful to have a well arranged section with new features that you might have not known existed up until now.

Conclusion

I really like reading this book, and the systematic knowledge that it provides. Whether you are a full time System Administrator or just a part time occupied with the IT in your company, or just wants to establish a secure connection to your home this book will definitely give you the needed advices how to get there.

Biography

My experience with OpenVPN is based on three years’ of deployments.  My first deployment was on OpenWRT where I had to use predominantly command line to configure it and Secure copy (SCP) for certificate transfer, then on DD-WRT where most of the work is done through the Web GUI, with exemption for more advanced configuration that have to be placed in start-up scripts. After that on I used Windows based systems as clients and servers, and lately as you can see from my blog I’m working with pfSense.

Posted in TechnicalTagged Network, OpenVPN, pfSense, PKI, Site To Site, Technical1 Comment

Building Site to Site Connection with OpenVPN on pfSense 2.0 RC1 with PKI

Posted on 11/05/2011 - 18/02/2019 by Stefan

In the last post we’ve setup a Site To Site with Shared Key, now instead we will use internal Certificate Authority. Honestly speaking if I did not follow this guide, there was no routing between the two sites.
OpenVPN Site-to-Site PKI (SSL)

For reference here is the network diagram:

pfsense01 will be out OpenVPN server, and pfsense02 will be our OpenVPN client. Client and Server are just host on the two LANs behind routers.

On pfsense01 go to System > Cert Manager, On CAs leaf create new Certificate Authority.

Enter Descriptive Name, choose as a method Create an internal Certificate Authority, leave Key length and Lifetime to defaults.

Fill in the rest of the fields.

Then go to Certificates leaf, add new and create the server certificate.

Enter descriptive name, I’ve used the router host name, as a method choose Create an internal Certificate.

Verify that for Certificate authority the CA that we have created in the previous step is selected. Leave the rest of the fields to default, with exception of Common Name, here enter the host name of the server, in my case it was pfsense01.

Now go to System > User manager, create new user. For the sake of simplicity for username I’ve used the host name of the second router, pfsense02. Enter Password, for Full name I’ve used again the router name. Then tick the Click to create a user certificate.

For descriptive name use the host name of the router, this is the Common Name of the certificate and it is important to match.

Instead of creating new user, you can create new Certificate directly.

Go to Cert Manager, on the Certificate leaf add new. Again as Descriptive name and Common Name use the host name of the second router, in my case pfsense02.

Go to VPN > OpenVPN on the Server leaf, add new.

As Server Mode select Peer to Peer (SSL/TLS). As protocol UDP, Device Mode is TUN, Interface is WAN, leave the port to default 1194. Enter Description, Tick Enable authentication of TLS packets and Automatic generation a shared TLS authentication key.

As Peer Certificate Authority select the CA that we have created in the beginning. I did not have a Peer Certification Revocation List so leave it to None. Select the Server Certificate that we have created. For DH Parameters Length you can leave it to the default 1024 bits. Choose Encryption algorithm in my case BF-CBC (128-bit), take note of the algorithm we have to use the same on the client too.

As Tunnel Network choose one different from your LANs, in my case the default 10.0.8.0/24. Enter the Local Network, in my case 10.10.9.0/24. Enter the Remote Network in my case 10.10.10.0/24. Leave the rest to defaults.

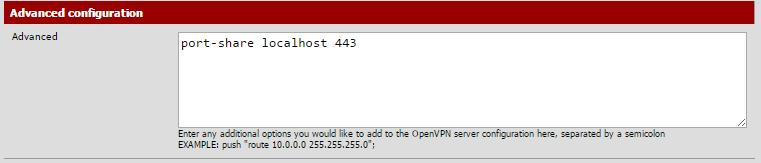
Go to VPN > OpenVPN in Client Specific Overrides, and add new entry for the client.

For Common name enter the host name of the second router that we have used as common name in the certificate, in my case pfsense02. Enter some description, and the Tunnel Network, in my case 10.0.8.0/24. Leave the rest to default.

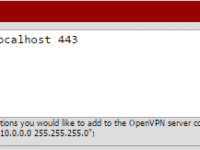
In the Advanced form, enter

iroute 10.10.10.0 255.255.255.0

Without this step there will be no routing between the two LANs.

Got to Firewall >Rules and on the OpenVPN leaf, add new rule.

Here for testing purposes I’ve made allow all rule. Select any as Protocol, leave the rest to default and enter description.

For the client to be able to connect, let’s open the OpenVPN Server port.

In Firewall > Rules on the WAN leaf, add new rule. Select UDP as Protocol.

As Destination port Range in our case select OpenVPN.

Now it is time to export certificate for use on the second router.

Go back to System > Cert manager export public and private CA certs, click on the first downward pointing triangle. As a guide, when you hoover over it the text label is Export CA.

Then go to User Manager, enter the configuration of our user pfsense02, in the User Certificates section click on both downward pointing triangles to download both cert and key.


Now on pfSense02, go to System > Cert Manager on CAs leaf, add new one.

And as Method select Import an existing Certificate Authority. Enter as Descriptive name the name of the certificate from the first server, in my case pfsense01.

You have to have opened the certificate with notepad, or another text editor. Then simply copy / paste the content of the file.

Now on the Certificate leaf do the same but paste and the content of the  *.key in Private key data. Again enter Descriptive name as the one from the first router.

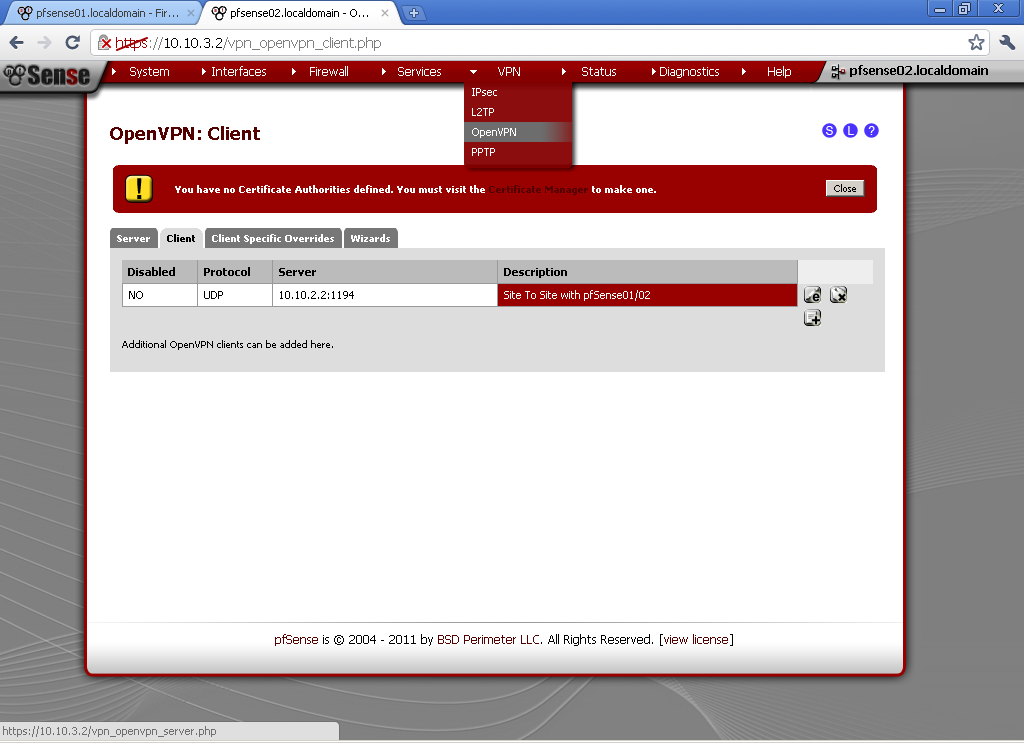
Go to VPN > OpenVPN in Client leaf and add new

As Server Mode select Peer to Peer (SSL/TLS), Protocol is UDP, Device mode is TUN, and Interface is WAN. For Server host or address enter the WAN IP of pfsense01, in my case 10.10.2.2 and enter the port. Put some Description.

Open the Server configuration (VPN > OpenVPN > Server leaf) on pfsense01, copy the TLS Authentication.

Paste it in the TLS Authentication form on our client configuration on pfsense02. Unpick Automatically generate a shared TLS authentication key and leave Enable authentication of TLS packets.

Use the same Tunnel Network as on the server, in my case 10.0.8.0/24. Enter Remote Network, this is the network behind pfsense01, for this case 10.10.9.0/24.

Add Allow All rule in Firewall > Rules on the OpenVPN leaf.

Now go to Status > OpenVPN and you should see that the connection is established.

From the Server prospective, again on Status > OpenVPN.

Now you should be able to access hosts from the other network successfully.


Posted in TechnicalTagged Network, OpenVPN, pfSense, PKI, Site To Site10 Comments

Building Site to Site Connection with OpenVPN on pfSense 2.0 RC1 with Shared Key

Posted on 02/05/2011 - 18/02/2019 by Stefan


Sooner or later you will have two or more geographically distant LAN that you want to connect together. Whether we are speaking about to branch offices or home and office, or simply your office LAN and some co located servers in a data center, it is only a matter of time before you need such solution.

In this case we will use two pfSense 2.0 RC1, one in each remote location.

The map shows our lab setup for the purpose.

In this post we will use Shared Key as a way to authenticate the two routers.

On pfSense01, this machine will play the role of server in this scenario.

Go to VPN > OpenVPN, on the Server leaf, add new one

As Server Mode choose Peer to Peer (Shared key)

Protocol, Device Mode, Interface, Local port – you can leaf the default for now.

Description – Enter whatever is informative for you.

Encryption algorithm, choose one by your preference, keep in mind that different algorithms have different load on the server. I use BF-CBC (128-bit)


Choose different from both of your LAN subnets for Tunnel Network, in our case 10.0.8.0/24.

Local Network – The LAN behind the pfSense01, in this example 10.10.9.0/24.

Remote Network – this is the LAN behind the pfSense02, as on the diagram 10.10.10.0/24.

Click on Save button and we are Done.

Open the newly configured server and copy the Shared Key. We will need it for the setup of pfSense02.

Go to Firewall > Rules, on the WAN leaf, add new rule

The Action is Pass, Select WAN as Interface, UDP as Protocol.

For Destination port range, select OpenVPN in our case it is 1194, if you have used some other port in the configuration enter it here. Enter some description also.

Go to the OpenVPN leaf. Here I have made a very basic Allow All rule. If you have some security concerns, or want to limit the communication between the two sites, make one or more rules to fit your need.


pfSense02 will play the role of client.

Go to VPN > OpenVPN, on the Client leaf, add new one

As Server Mode choose Peer to Peer (Shared key)

Protocol, match the one from the server in our case UDP, Device mode – tun, Interface is WAN, Local port, leave empty for random, or enter manually one if you want.

Server host or address, enter the WAN IP address on the first router pfSense01, in our case 10.10.2.2. Server port, whatever port you have used on the server, in our case the default 1194.

Enter Description. For Shared Key, paste the one from the pfSense01 here. Encryption algorithm, duplicate the one from the first configuration, in our case BF-CBC (128-bit).

Tunnel Network, duplicate the one from the server. Remote Network is the LAN network behind the pfSense01, for our example 10.10.9.0/24.

Leave the rest to default, and Save the configuration.

Again add a rule on the OpenVPN leaf in the Firewall > Rules section to allow traffic flow between the two sites. Here again I’ve setup a rule that Allow All traffic between the two sites.

Now go to Status > OpenVPN. You should see that Status equals UP.

Now you should be able to successfully communicate with hosts from the other network.

Posted in TechnicalTagged Network, OpenVPN, pfSense, Site To Site11 Comments

OpenVPN with RADIUS authentication on pfSense 2.0 RC1

Posted on 26/04/2011 - 18/02/2019 by Stefan

This is the last post in the series of authentication alternatives for OpenVPN in pfSense 2.0 RC1.

In the previous posts we looked at the local database of pfSense and Active Directory. Now we will use Remote Authentication Dial In User Service (RADIUS) instead. Again we will authenticate our users against Active Directory, as domain user accounts.

For that purpose we need to add Network Policy and Access Services server role to our Windows Server 2008 R2.

From the Role services select only the Network Policy Server. We don’t need any of the other services.

After the successful installation, open the Network Policy Server console. Under RADIUS Clients and Servers, create new RADIUS Client.

Take note of the Friendly name of the client, we will use is later in the Network Policy. In our case pfSense.

Enter the LAN address of pfSense, and Shared secret.

Leave the default configuration on the Advanced leaf.

We won’t configure additional Connection request Polies.

A new Network Policy is needed, because the default Connections to other access servers block requests send by pfSense.

Enter Policy name of your preference, and leave the default Type of network access server to Unspecified. Otherwise your authentication request will be denied.

For Condition, let’s add the Client Friendly Name. In our case the client is our pfSense router. Type in here the Friendly name that you used in the RADIUS Client configuration. In our case pfSense.


On Specify Access Permission, leave Access granted.

As Authentication Methods add Unencrypted authentication (PAP, SPAP). The explanation follows later.

Leave constraints to defaults, if you don’t have some specific requirements. The same is valid for Settings too.

All done

On your pfSense go to System > User Management > Servers add new.

Enter descriptive name of your liking. As type select Radius. Enter the IP address of the server that we just configure to be our RADIUS server. Under Services offered, leave the default Authentication and Accounting. Take note that we have not configured accounting on our NPS service, but you could easily enable it. The default ports are fine. If you have Windows Firewall, or some other kind of firewall service running, make sure required ports are open.

It is time to go to your OpenVPN Server configuration and select our new RADIUS provider as Backend for authentication.

Now if you make test connection with test user, take a look at the security logs on the RADIUS server.

You will see RADIUS Client Friendly Name match out configuration, and which Policies were used,and that the Authentication Type is PAP, that is why we added it to the policy earlier.

That’s it.

Posted in TechnicalTagged ADDS, OpenVPN, pfSense, RADIUS, Windows Server 2008 R25 Comments

OpenVPN with LDAP authentication on pfSense 2.0 RC1

Posted on 22/04/2011 - 18/02/2019 by Stefan

In the last post I’ve used Local User Database for authentication with the OpenVPN Server, but managing users in multiple places is redundant and should be avoided. If your users resides in Windows Domain why not use a Domain Controller for authenticating VPN users.

That’s way now we will use Active Directory.

For the purpose I’ve setup a Windows Server with Active Directory Domain Services. In a new Organization Unit called Test Users, there are a service account (domain\vpnsvc), and user account with witch we’ll do the tests (domain\user2).

On the pfSense go to System > User Manager > Servers


Add new one with the + sign button.

For Type select LDAP
Enter the IP address of your Domain Controller


In the Search scope, you have to enter the Base DN, you can find it by using ADSI Edit.


Now for Authentication containers, click on Select button and choose the ones in which users that will have access through VPN are.


Remove the tick from Use anonymous binds to resolve distinguished names, and enter the credentials for your service account. In my case this is the domain\vpnsvc service account.
For initial Template select Microsoft AD

Now on the Wizard for creating new OpenVPN Server
As Type of Server select LDAP

As a LDAP server, select the connection that we have configured just now.

Continue with the configuration of the OpenVPN server as usual, for references you can check my previous blog post on the topic pfSense 2.0 RC1 configuration of OpenVPN Server for Road Warrior with TLS and User Authentication

Now you can connect to the VPN using domain users account, in my example domain\user2.

I’ve test is and now if you disable some user account in Active Directory, you will not authenticate with the AD, and consequently connect to the OpenVPN.

To extend the configuration you can use multiple backend service to authenticate. Open you OpenVPN server configuration and in the section Backend for authentication select also the Local Database, or any other available to you. There is a little flow in this method. If you have a user with the same user name and the same password, the request is send first to the AD and after that the local database is queried for the user. I’ve guessed it after a little network sniffing. However how often would you have duplicate users in both databases at the same time? So this is just for your information.

Thank you for reading, have fun.

Posted in TechnicalTagged ADDS, LDAP, OpenVPN, pfSense, Windows Server 2008 R217 Comments

Posts navigation

Older posts

Tags

ADDS AES-NI Asterisk ASUS Azure Captive Portal Cell Phone CentOS Certification Creative DD-WRT DNS Hyper-V LDAP Learning Linksys Microsoft Mikrotik RouterBoard RB250G Network OpenLDAP OpenVPN OpenWrt pfCenter pfSemse pfSense pfSense 2.0 RC1 pfSense 2.0 RC3 pfSense 2.2 PKI RADIUS Raspberry Pi Routing Site To Site Technical Uncategorized VLAN VMWare VoIP Vyatta Web Sites Windows Server 8 Windows Server 2008 R2 Windows Server 2012 R2 Wireless Workstation 8

Archives

  • April 2020
  • July 2019
  • May 2019
  • March 2019
  • February 2019
  • October 2018
  • August 2018
  • March 2016
  • April 2015
  • March 2015
  • January 2015
  • February 2012
  • October 2011
  • September 2011
  • August 2011
  • July 2011
  • June 2011
  • May 2011
  • April 2011
  • March 2011
  • February 2011
  • July 2010
Proudly powered by WordPress | Theme: micro, developed by DevriX.