After we looked at the different options for Road Warrior and Site to Site configuration for OpenVPN on pfSense 2.0 RC1, now it is time to combine them in one solution.
Scenario
You have one or more Site to Site VPNs already and at least one Road Warrior setup for your users. Initially you are happy that you users can consume services from the site that hosts the Road Warrior, but then you want to give them access through the same connection to other sites connected to your main one.
Setup
Take a look at the network diagram.
pfSense01 serves the main site, and provides access to the remote users, but also has a site to site configuration with pfSense02.
If you are on the LAN (10.10.9.0/24) side behind pfSense01, you will be able to access machines through the Site to Site connection and communicate with machines on the other end, for example 10.10.10.99.
But if you are the VPN Client, you will be able to only access machines in the 10.10.9.0/24 network.
Our aim is to provide the VPN Client access to network behind pfSense02 (10.10.10.0/24) in addition to the 10.10.9.0/24 one.
Configuration
If you have already configured Road Warrior and Site To Site configuration skip to the Advanced Configuration section below.
Road Warrior
For reference how to configure it, you can look at my other posts, and choose depending on your needs:
pfSense 2.0 RC1 configuration of OpenVPN Server for Rad Warrior with TLS and User Authentication
OpenVPN with LDAP authentication on pfSense 2.0 RC1
OpenVPN with RADIUS authentication on pfSense 2.0 RC1
Site To Site
In case that you don’t have a site to site configuration ready, you can check out one of this posts:
Building Site to Site Connection with OpenVPN on pfSense 2.0 RC1 with Shared Key
Building Site to Site Connection with OpenVPN on pfSense 2.0 RC1 with PKI
Advanced Configuration
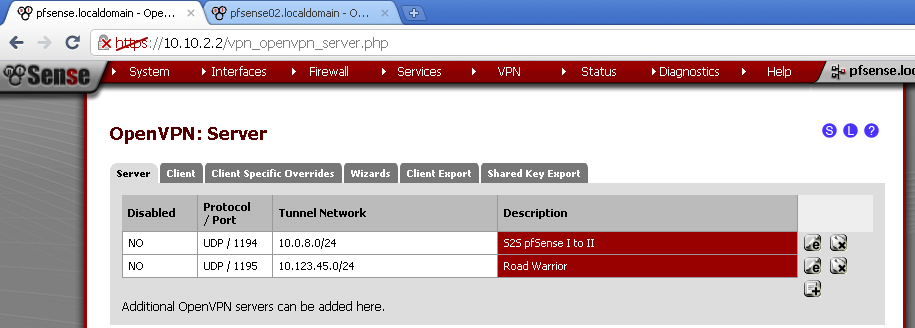
On pfSense 01,navigate to VPN > OpenVPN
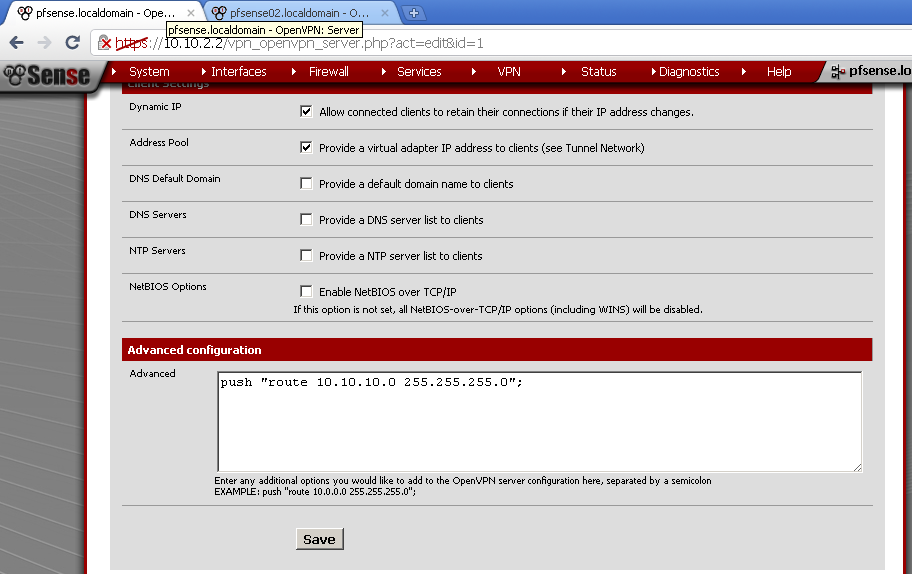
on the Server leaf, in the Road Warrior configuration scroll down to the bottom section titled Advanced Configuration
and enter this line:
push “route 10.10.10.0 255.255.255.0”;
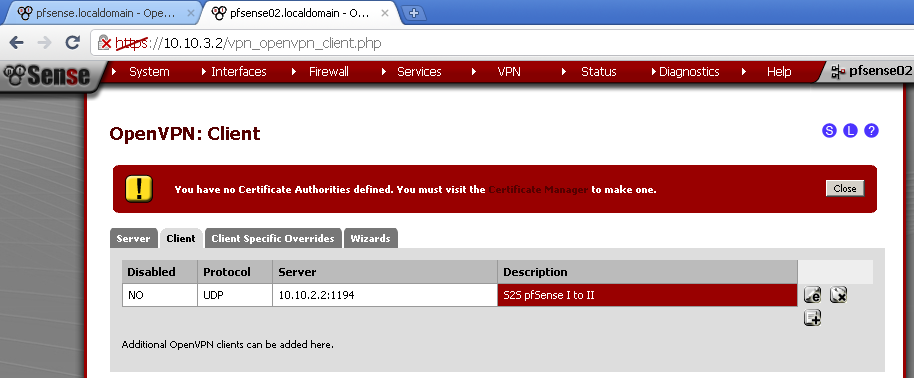
On pfSense 02, again navigate to VPN > OpenVPN, on the Client leaf, and open the Site To Site configuration
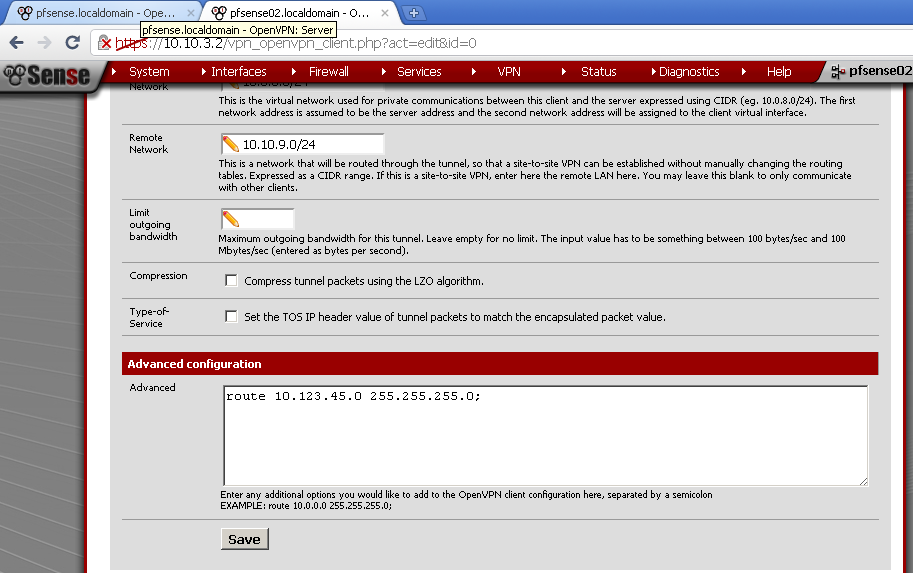
Scroll down to the bottom section titled Advanced Configuration, and enter this line:
route 10.123.45.0 255.255.255.0;
Explanation
As jimp explained in the thread mentioned below,
The push “route 10.10.10.0 255.255.255.0”; on the Road Warrior configuration tells the client that they can reach machines on the second site via the OpenVPN connection. While establishing connation OpenVPN Client adds an additional route to the second site.
The route 10.123.45.0 255.255.255.0; will instruct the second site how to answer on requests from the OpenVPN Client.
Testing
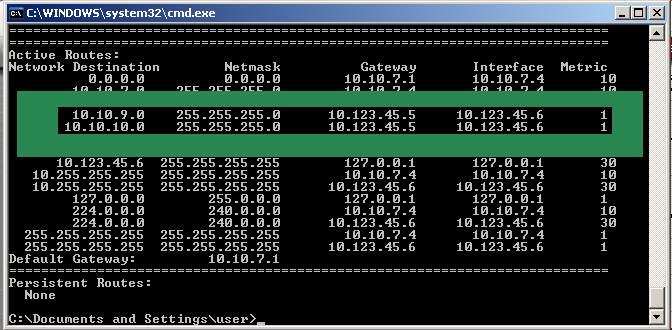
After you save the configuration changes, connect to the Road Warrior, and test you connectivity to machine on both sites.
References
While I was configuring similar setup, the routing part was new to me and I found it difficult to grasp at the time, but thanks to jimp’s help on the matter everything is crystal clear.
You can check out the thread in the pfSense forum here:
Topic: Routing Road Warrior to Site-To-Site, pfSense as OpenVPN client configuration


Thanks! I missed the return route in my similar setup! Your guide helped me a lot 🙂 Though, a little confusing that in your example the WAN addresses are in the private range…
Yes they are, because of my lab setup. You could take a look at my network lab setup
This is way more helpful than aynthing else I’ve looked at.
very sorry english speech very basic. first time at this site, thx
for writing. #_# from Hungary
I just wanted you to know that year 2018 this was still helpful!